
Thanks to the quirkiness of the Trans-X sensor, the topic of the raw conversion remains fertile ground for those who blog on the Fujifilm line of cameras.
For those of you not familiar with this issue, the color pattern of the Fujifilm Trans-X sensor, is more complex than that of a more conventional Bayer sensor used in pretty much every other digital camera. For many years, we have sought the best method for the conversion of raw files from this unique sensor. I’ve written on this multiple times in the past. Now in 2019, we are faced with some new choices and options,several of them free. I though I would do an informal comparison.
There has been, and always will be, Adobe’s raw conversion software either in Lightroom or Photoshop versions. This converter has been accused of less-than-stellar performance with the Trans-X sensor. But lo and behold, Adobe has included a new feature, in their latest Photoshop version called “Enhance Details”. This is said to be aimed in part, at the Fuji sensor problem.
Phase One, whose “Capture One” software, has always performed somewhat better with Fuji raw files, has been updated to version 12. More interestingly, they have released a free Fujifilm only version, which presumably replaces the former Silkipix software that was bundled with the Fuji cameras. The latter software performed very well, but because it was in no one’s workflow, it always felt kludgy and uncomfortable to use.
Another free software workaround for Fujifilm raw files comes from Irident Digital. Though the company offers a fairly reasonably priced raw development package, many of us frugal types, have taken advantage of their free “Irident Transformer”. This is a simple application that transforms Fujifilm raw files into another raw file, in this case, the ubiquitous .
I thought it would be interesting, to compare files, converted in as close a manner as possible, for different methods, in this case straight Adobe camera raw conversion, then a conversion using the “enhance details” feature. These can then be compared to conversions done by Irident/Adobe, and by the free Fuji version of Capture One 12.
I decided to use 24-megapixel X-Trans 3 files from both my new Fujifilm XE3, as well as the 16-megapixel files of the previous X-Trans 2 sensor from its predecessor, my now departed X-T10.
Now right up front, this is an inexact comparison. I did play around to try to obtain the best image possible from the different conversion software, but I don’t think things like sharpening and clarity for instance, can be directly correlated between Capture One, and Photoshop.
A word about the workflow. Perhaps because of familiarity, there’s no doubt that for me that Adobe Bridge, Camera Raw, and then Photoshop make for an extremely comfortable process. I’ve used Capture One for many years, but even now I’m a little vague on some of its features. This may be my fault in that I have probably not been as diligent as possible watching their tutorials.
Adding Irident Transformer conversion to the Adobe workflow ads exactly one step, and works pretty well. Conversion is quick, and I have set up a file called “Irident conversions” on my computer to receive them. One then the open is a converted, you can open file in your raw conversion software of choice. My only
Oddly enough, the Adobe “enhance details” feature is less conveniant inthat it seems to take forever to process a file. It can take up to 2 to 3 minutes to run on my fairly high-end Intel I7 desktop.
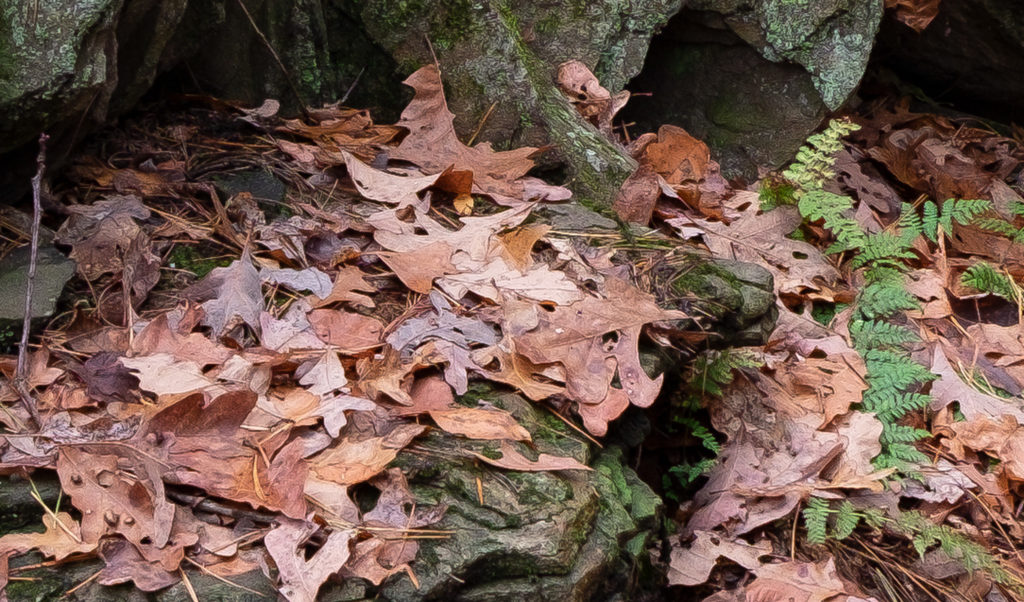
So how do they perform? Here first is a representative file from the XE3 at 200%:
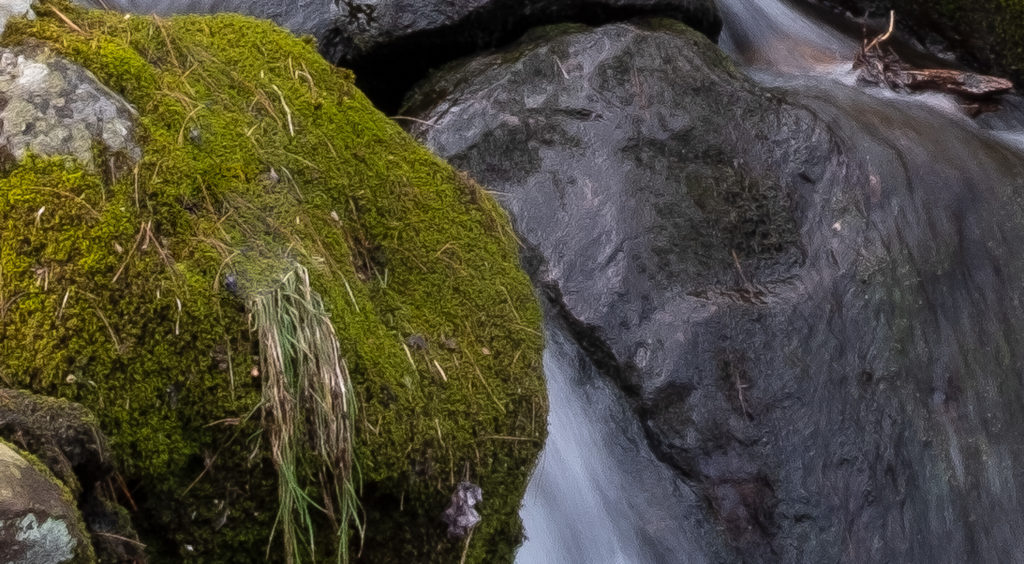


I think it’s fairly obvious that the straight Photoshop version, even given the limitations involved in these jpegs, is inferior to the image processed using either of the other methods. I was hard-pressed, even looking at the original files, to decide on a winner among these though I settled on the Capture One conversion as slightly more detailed than the others. I was initially unhappy with my original Irident conversions which looked “harsh”. I came to realize however that there is some sharpening occurring in that during the .raw to .dng conversion. Once I backed off on the sharpening in Camera Raw, things improved markedly.
Also, I didn’t attempt to convert the Irident file using Capture One , Though it is certainly possible, given that the .dng file format was created by Adobe , I assume their software will convert it as well or better than anyone else .
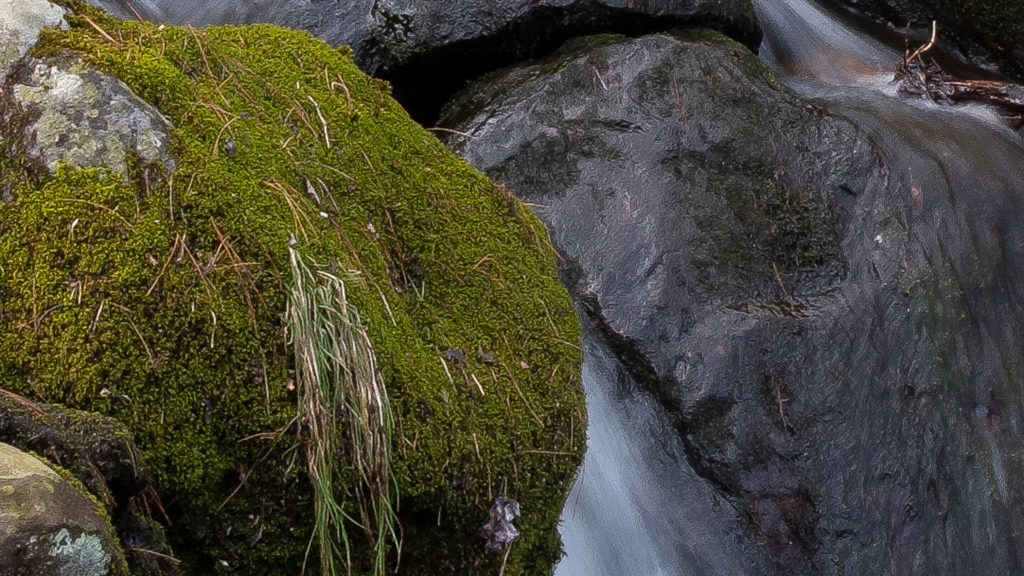
Now let’s have a look at the X-T10 files, again at 200%

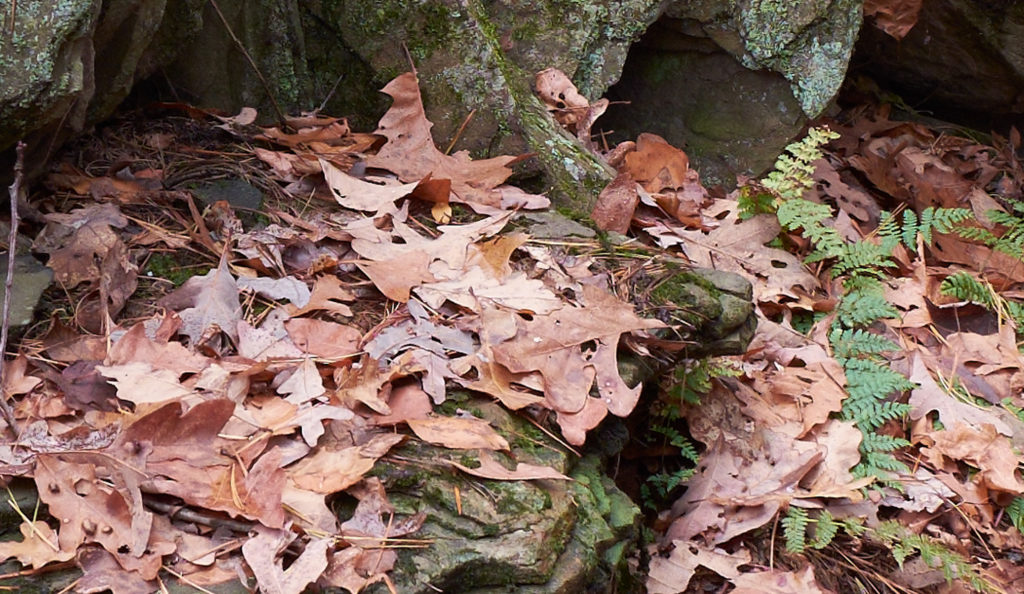

In posting these, I fear that, the JPEG compression of the files, plus the compression inherent in WordPress, has somewhat minimized the differences between these files. Yet I can tell you that on my monitor, there is a clear difference between the straight Camera Raw conversions and the other methods. I would say that between the Enhanced Detail, Adobe conversion, Irident plus Camera Raw, or Capture One 12, there is no clear winner.
I must say, given the effort required to optimize X-Trans files, and that diminishing value of the technology as time marches on, I can certainly be convinced, that at some point, perhaps this sensor type should be abandoned.
On the other hand, those of us who have been Fujifilm shooters for a long time know that a portion of the brand’s appeal has always been unique sensor technology (remember the SuperCCD of the S3pro?).
In summary, I would say that Adobe has finally given us the ability to process with Fujifilm files at a level that matches the best rival conversions.
I just wish it wasn’t so slow both in coming, as well as in use.