Posts tagged with: Lake Placid

More Photography with the Samsung G20.

Smartphone fine art photography? After two months with my Samsung Galaxy S 20, I have to admit it appears to be a real option. Though I am not sure, that all of my work qualifies as “fine art” I would say that in 2021, a state-of-the-art phone camera module is no longer severely limiting.

I’m writing this follow-up article to demonstrate what I’ve been able to capture with my new phone.

First, let me say that these images are not all intended to be jaw-droppers. Some of them were shot rather specifically to reveal the sensor’s abilities/limitations. Others were shot with somewhat higher aspirations Hopefully, they are somewhat pleasing.

Suna nd Snow Shower ( Samsung Galaxy S20 EW 5G)

In 2015, Samsung introduced a brand-new line of cameras called the NX series. It was Samsung’s first foray into a mirror list interchangeable lens camera, and it hit the market with a splash. It was beautifully constructed, extremely well-featured, and came with very fine newly designed lenses.

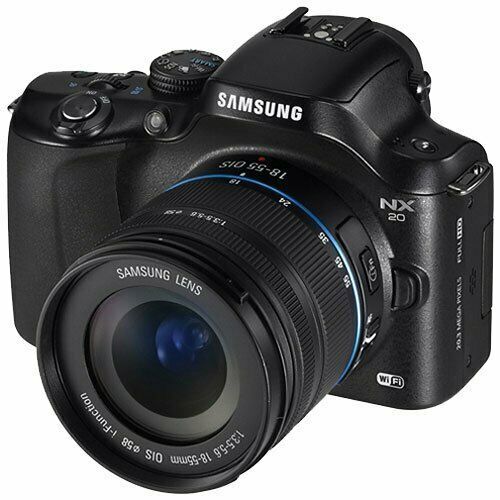
Most interestingly, it also featured a Samsung-manufactured, very high-quality 28-megapixel sensor. This was shockingly competitive with sensors made by the dominant manufacturer’s Sony and Canon. It was for a time, highly promoted. Samsung hired a number of very well-known photographers for this purpose. I shot with a loaner camera at a photo expo in Seattle and was very impressed.

Then suddenly, the Samsung NX series was no more. Apparently, Samsung decided that cameras “weren’t their bag” and they dropped the product line rather abruptly. It’s actually a shame because there was clear potential for this product.

Bridge ( Samsung Galaxy S20 EW 5G)

Apparently, they didn’t forget how to make sensors. As you saw perhaps in the last article I wrote about the S20 weeks ago, despite the diminutive size and tiny pixels, it can produce very high-quality files. Given this, I decided to keep it in service.

Sign in at Ampersand ( Samsung Galaxy S20 EW 5G)

For the most part, I shot it entirely in raw which is available in “pro” mode. Shot this way the camera produces a .dng file in a 4/3 format and a wide format JPEG. The latter is processed by the phone’s software. Very typically the results of the processing are fairly pleasing and pleasant to look at on the small screen. Details in the JPEG files are definitely smoothed out by the processing and don’t appear useful for anything beyond digital display.

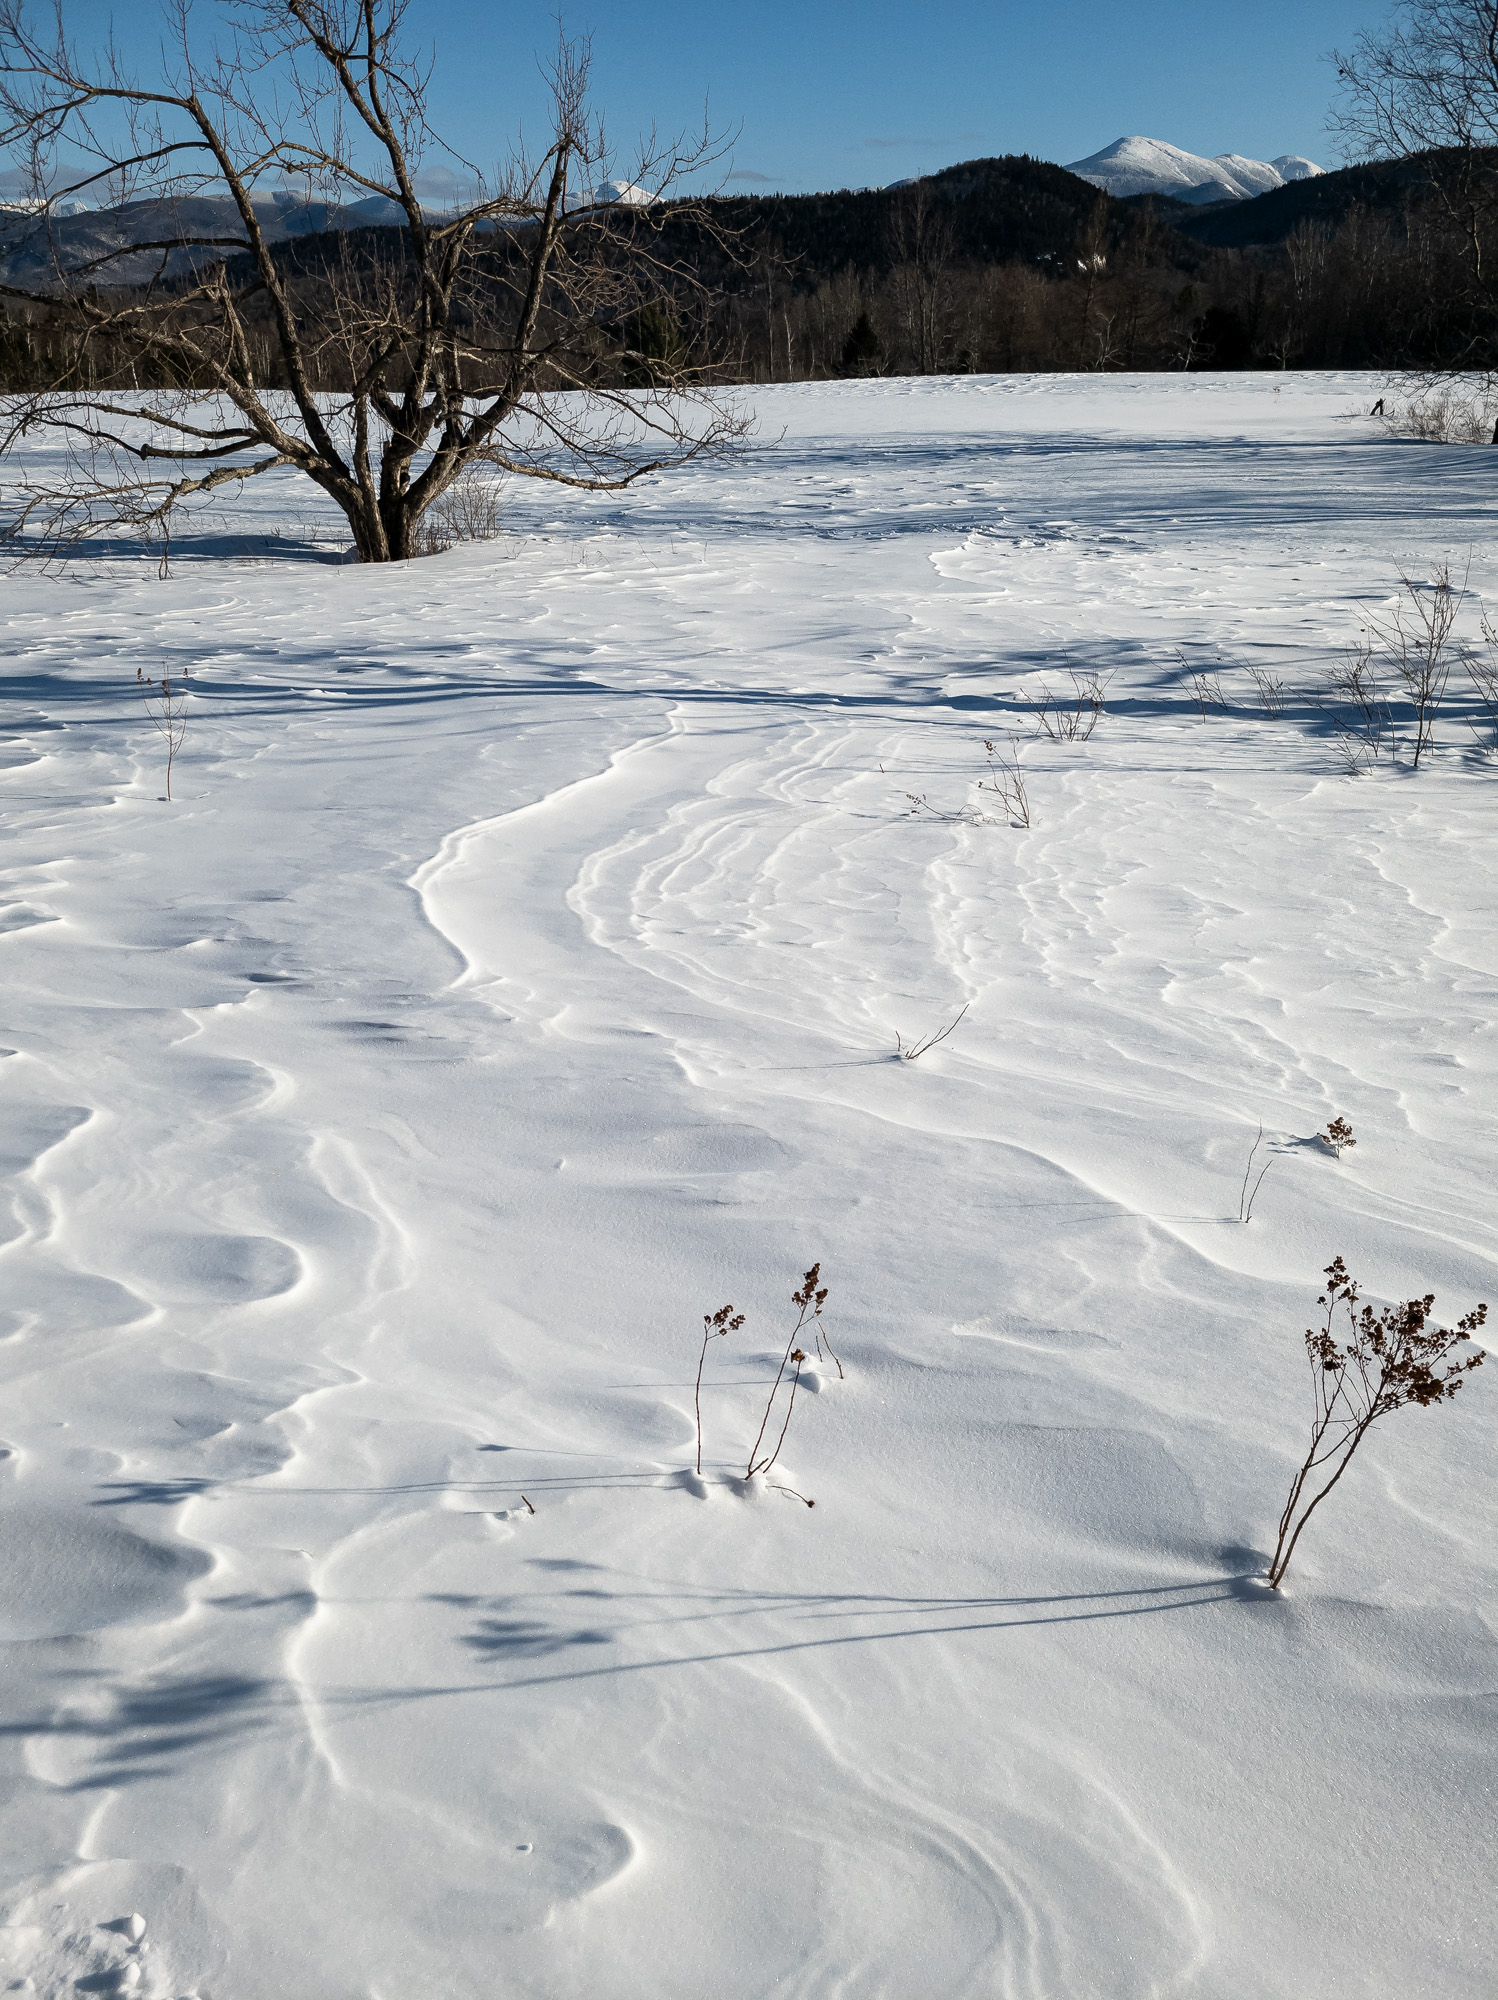
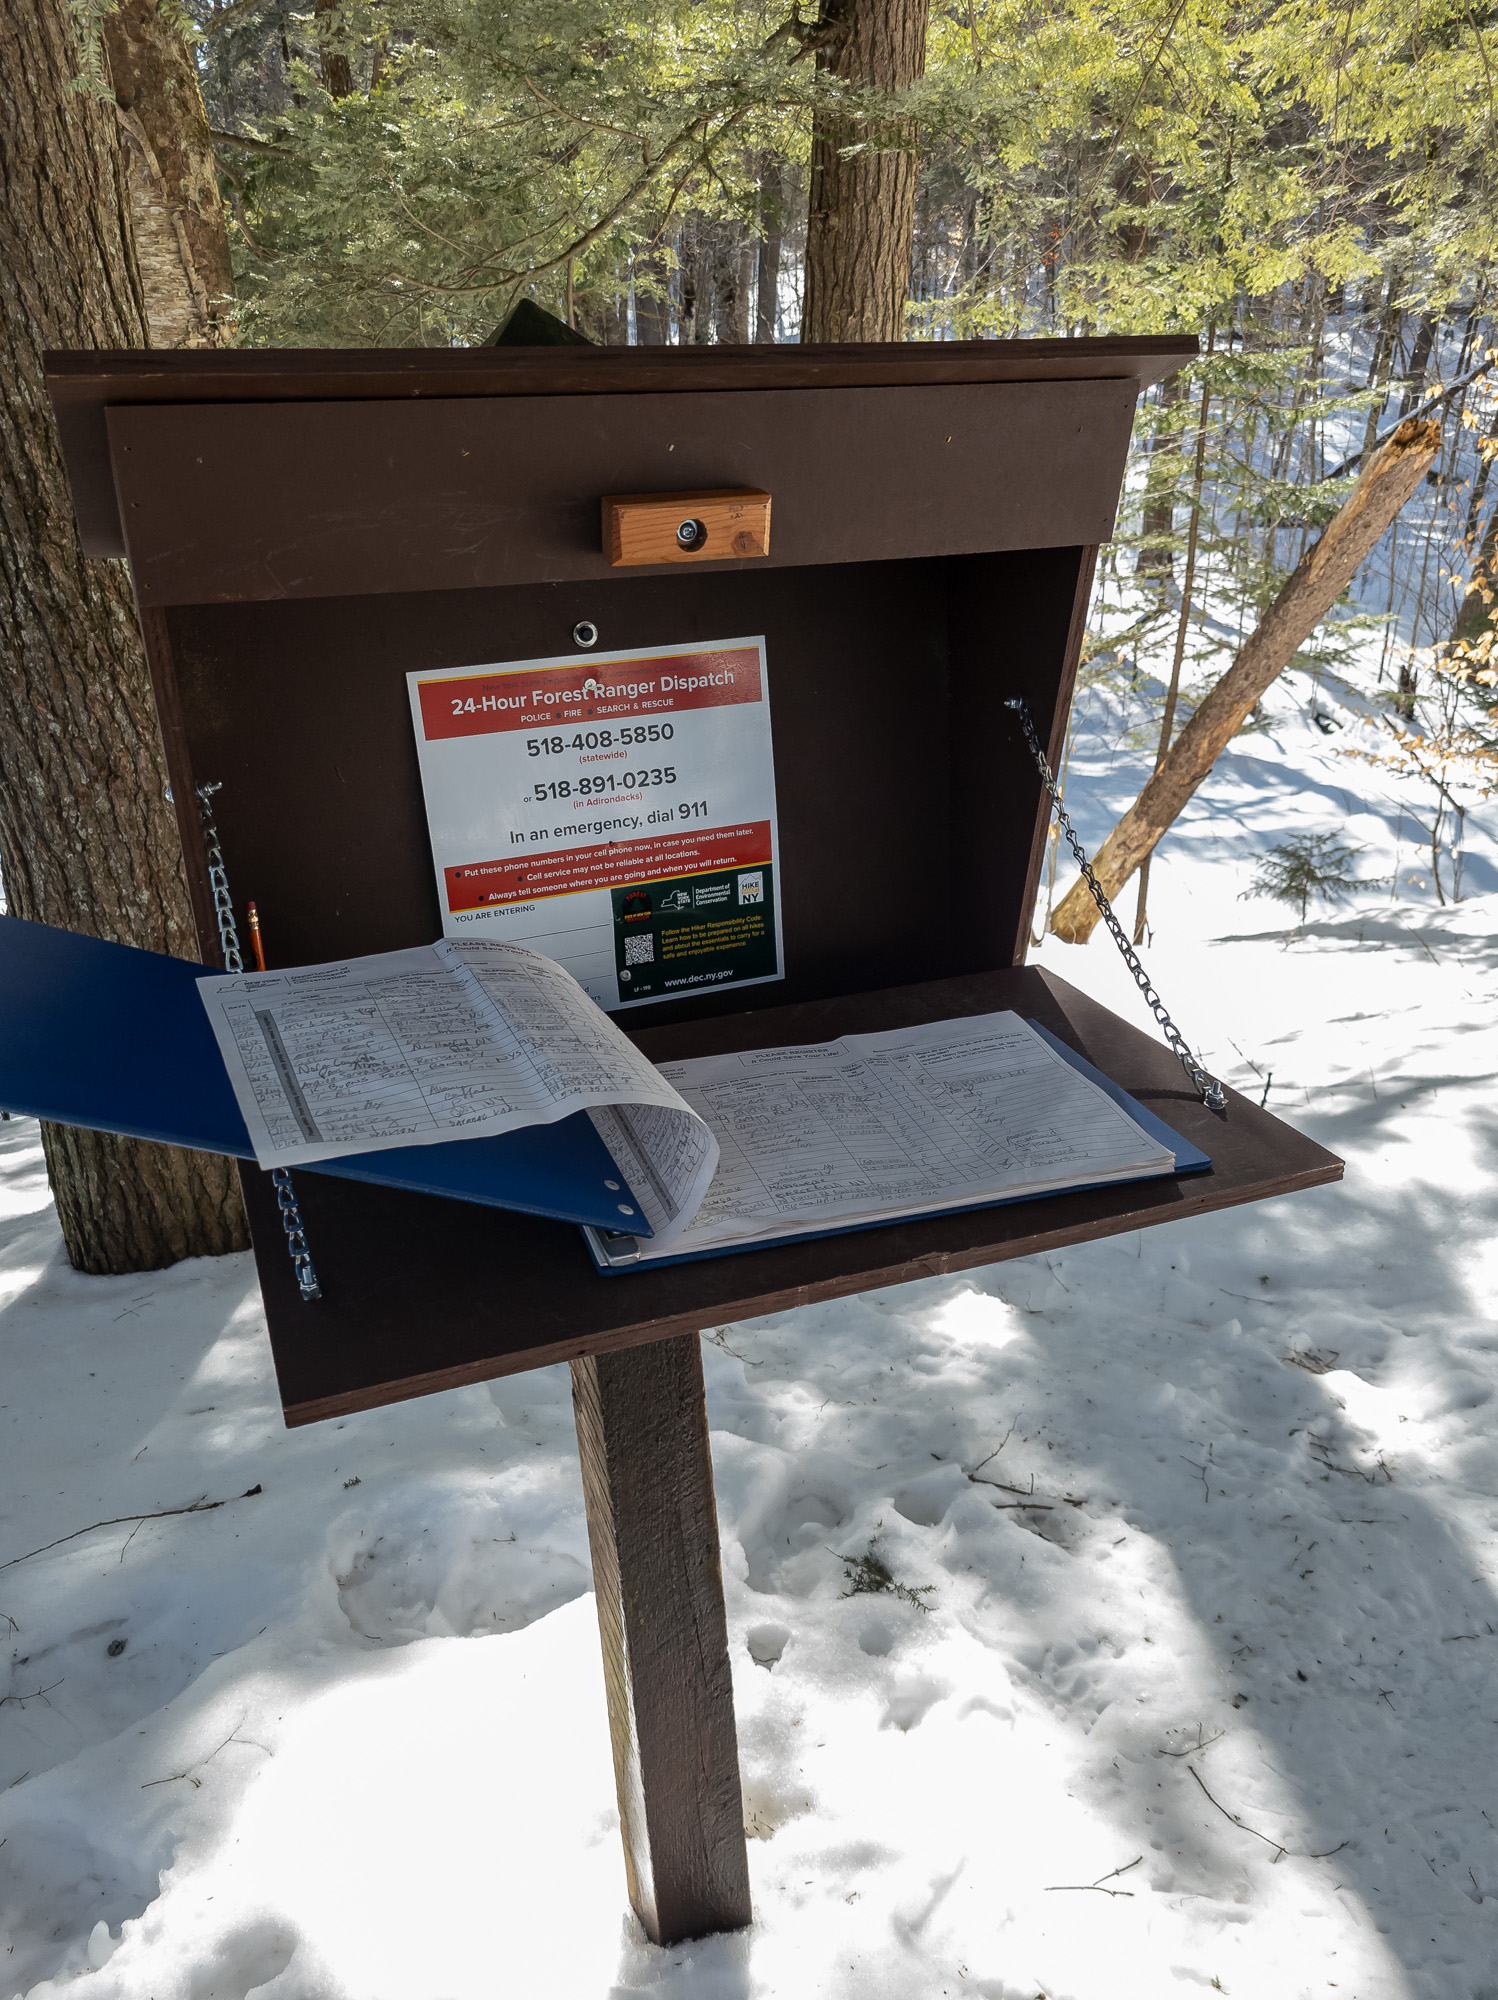
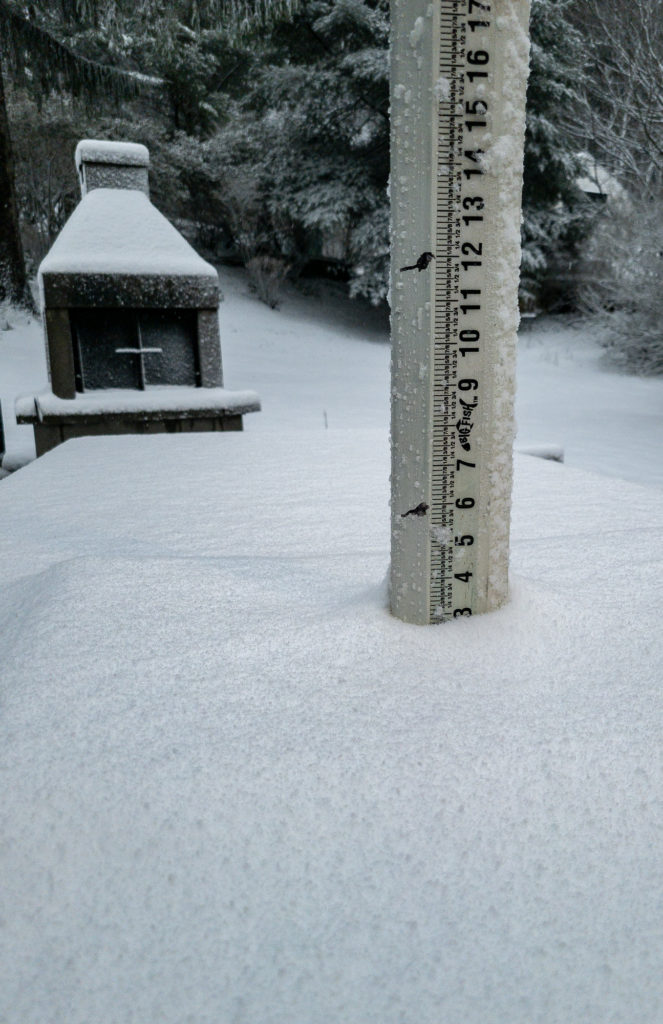
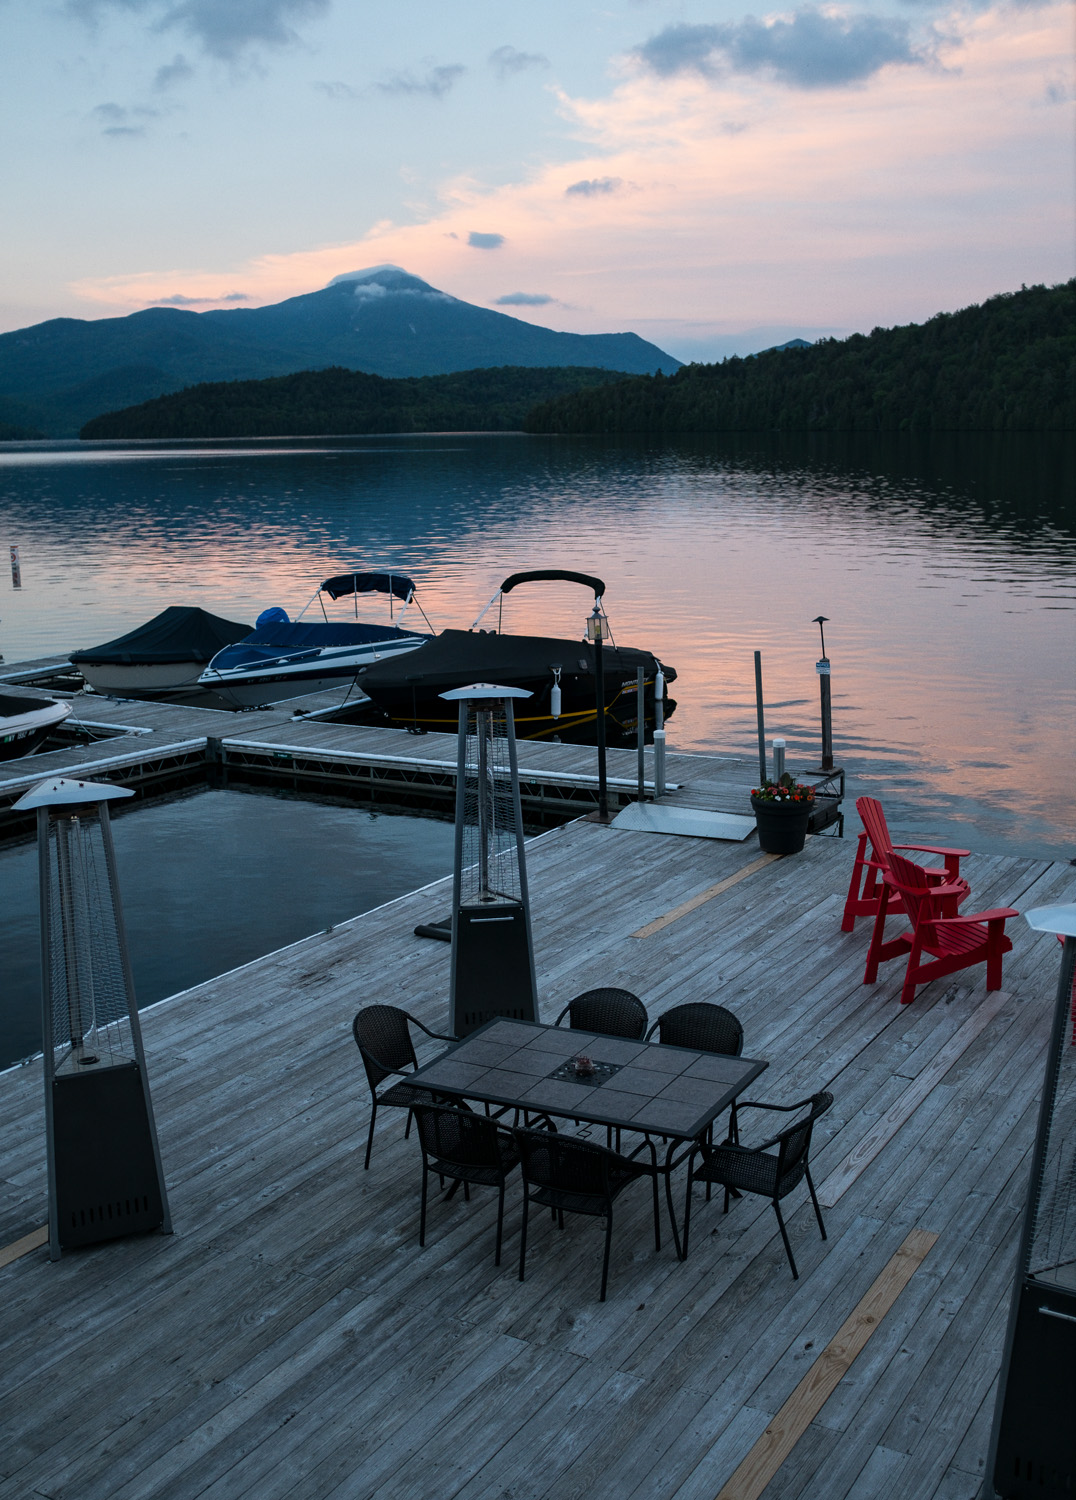
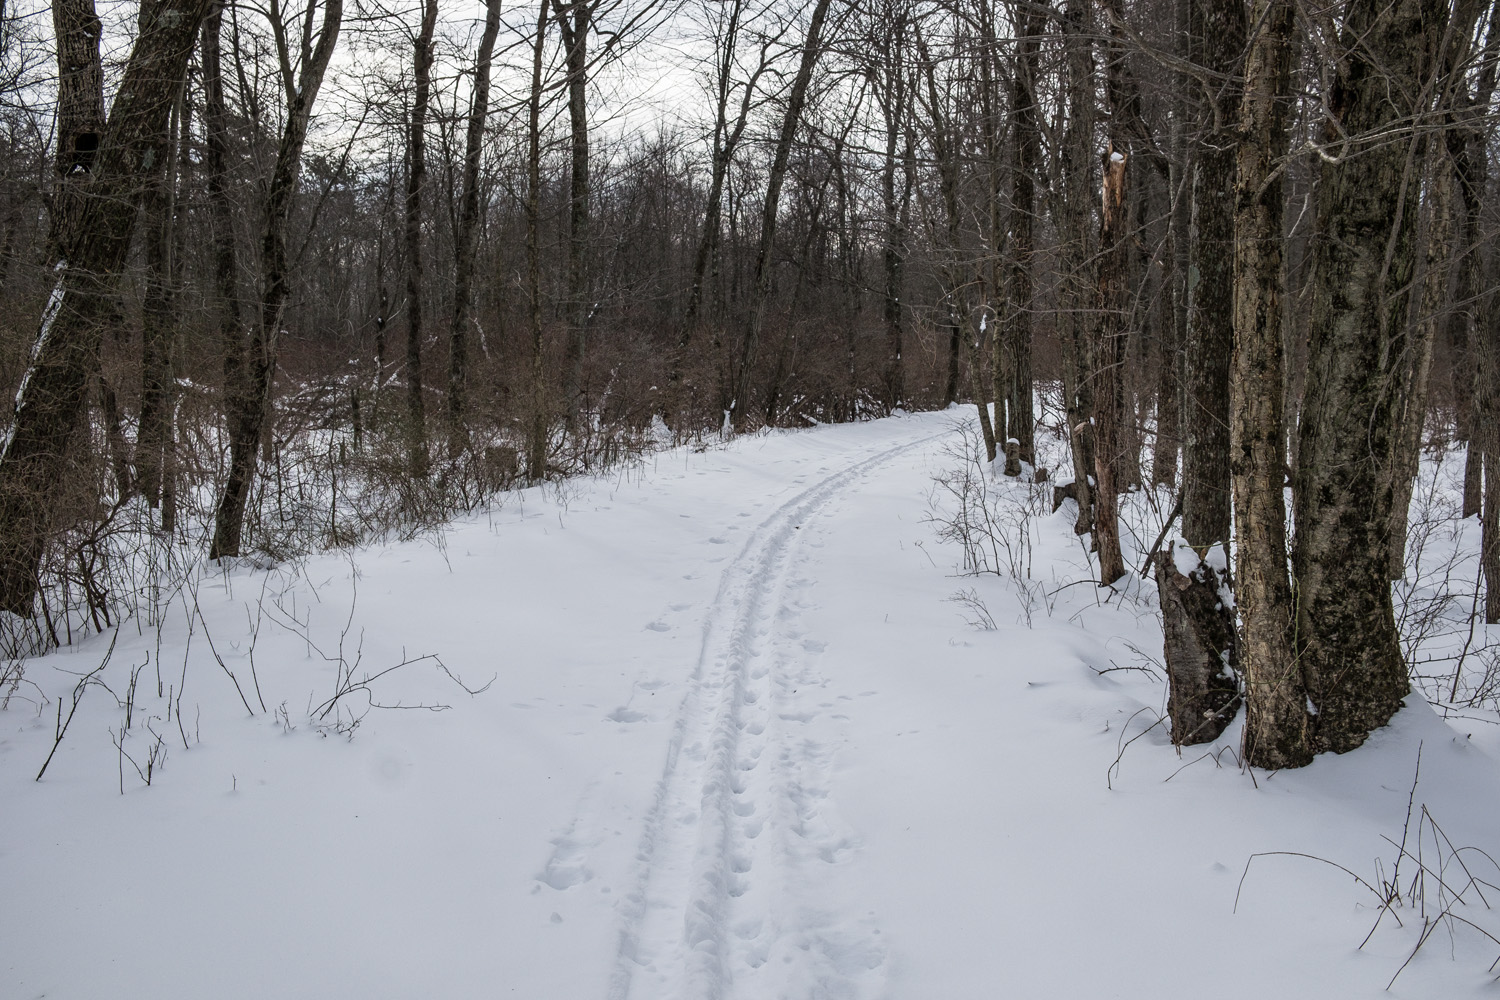
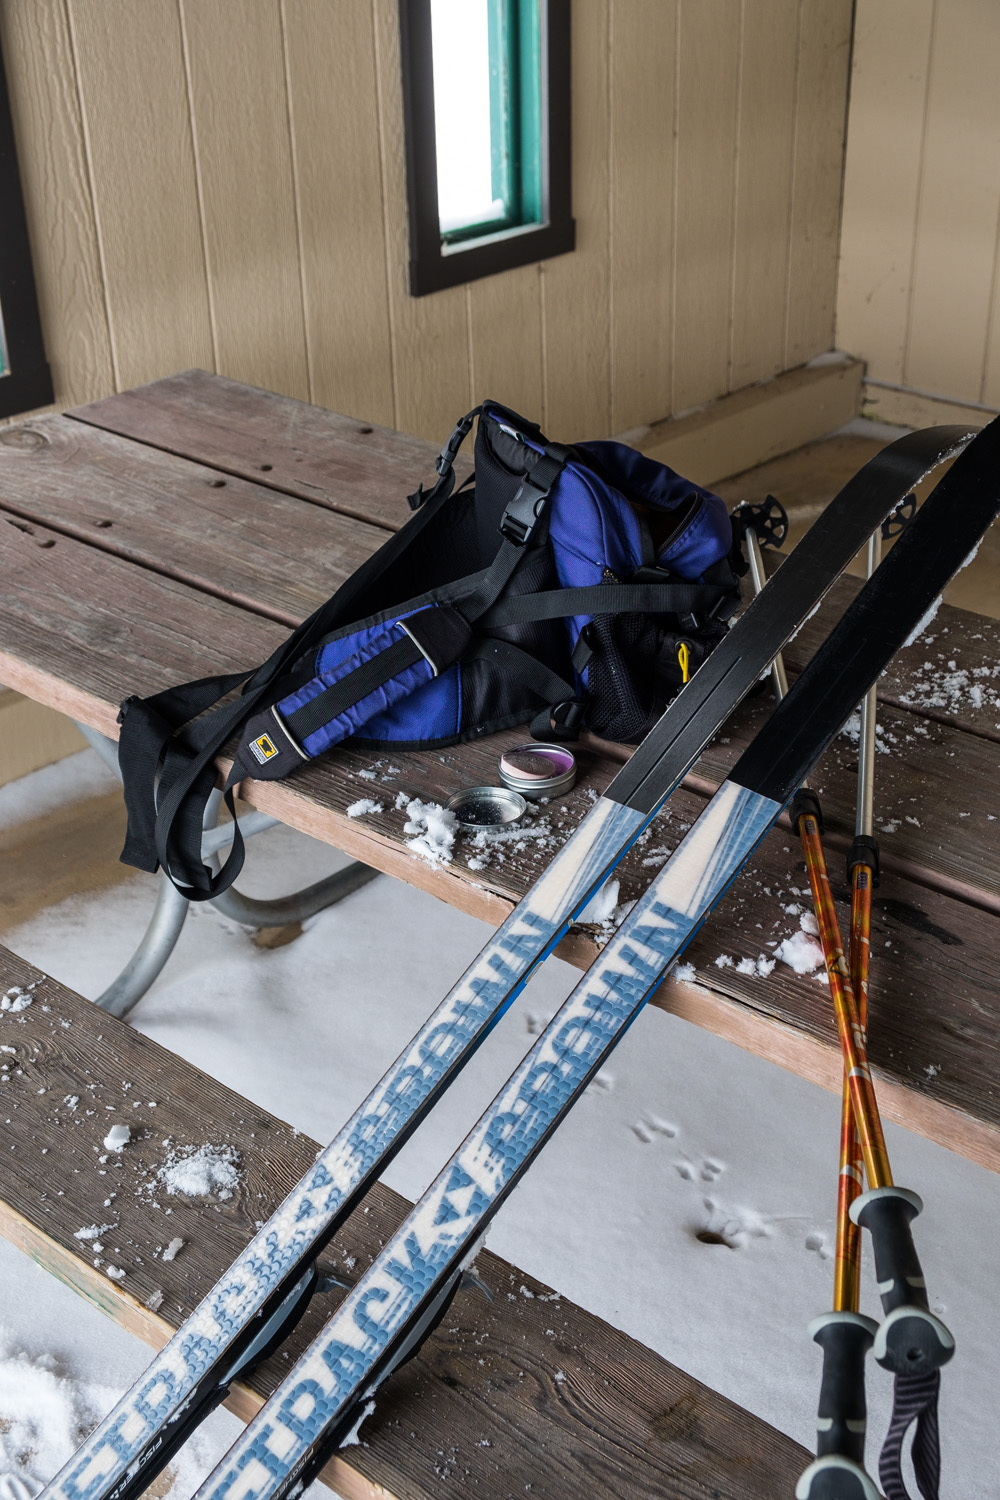
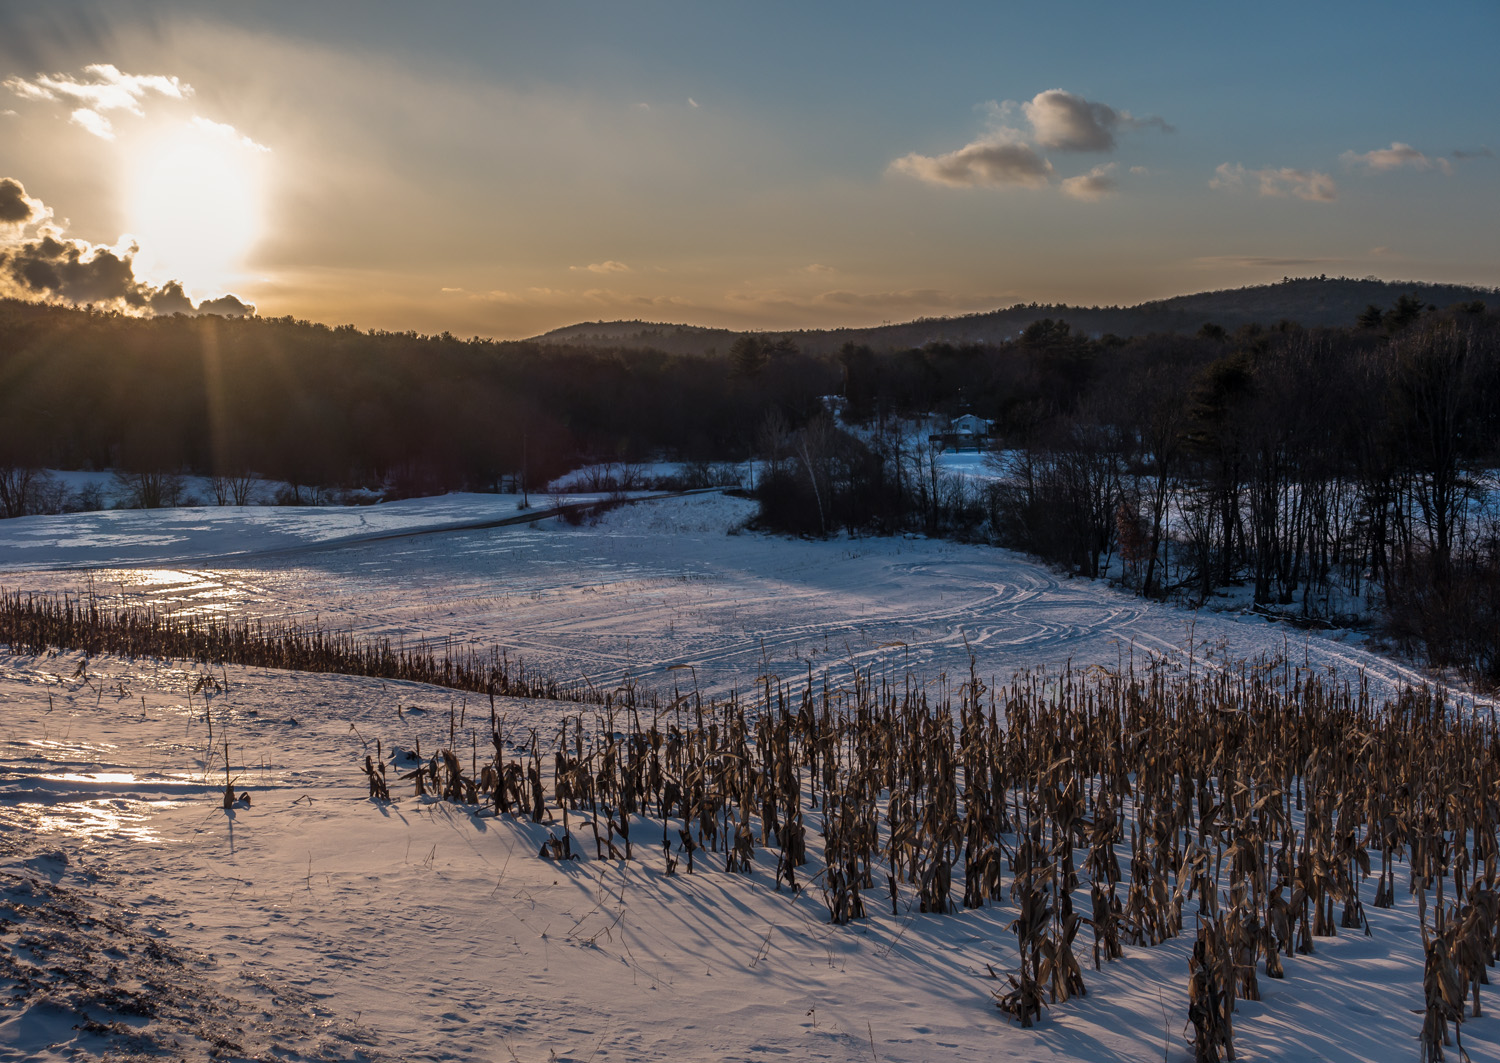
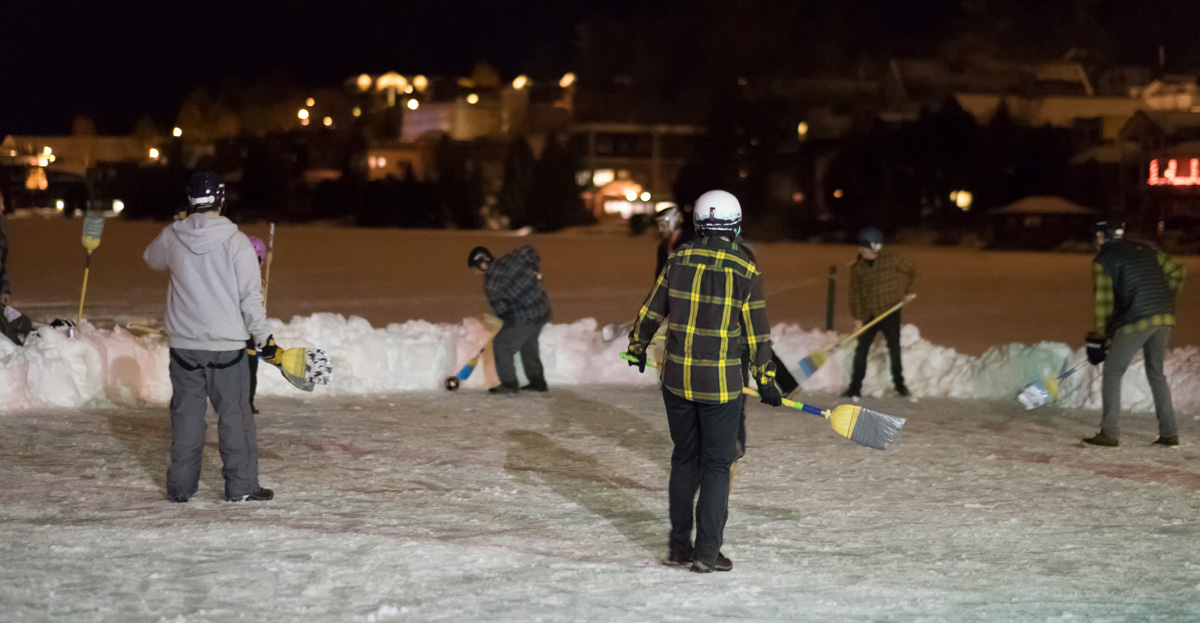
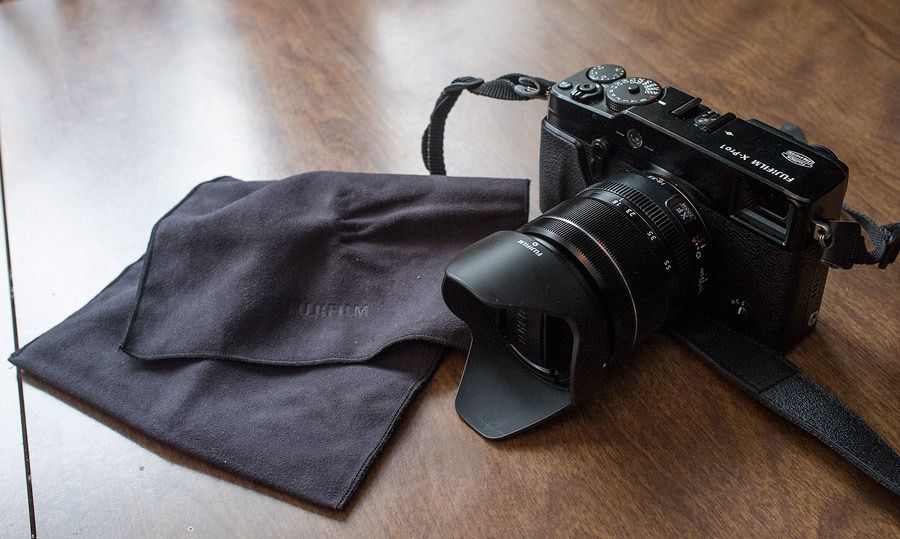
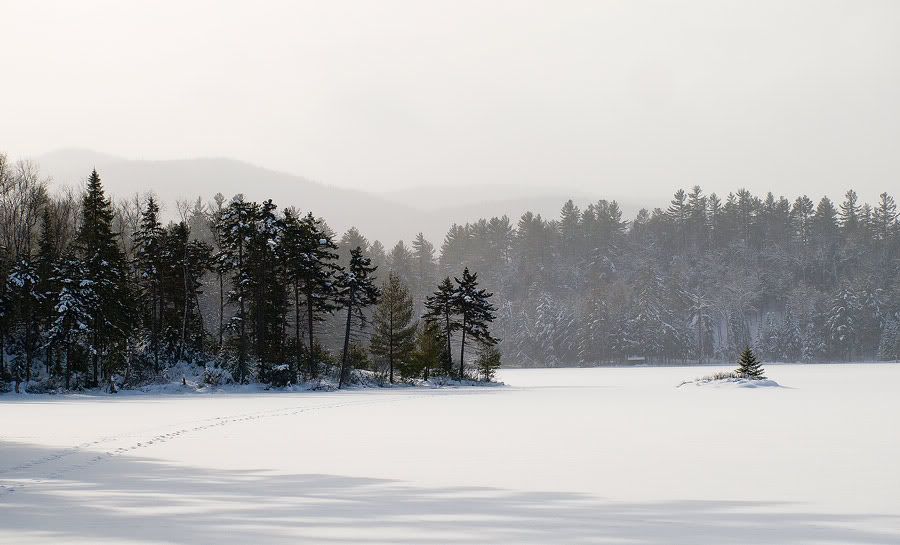
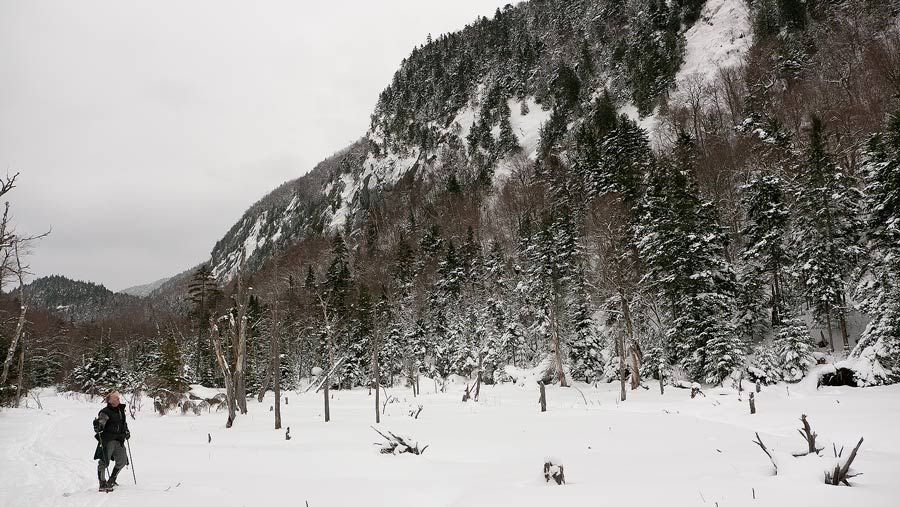
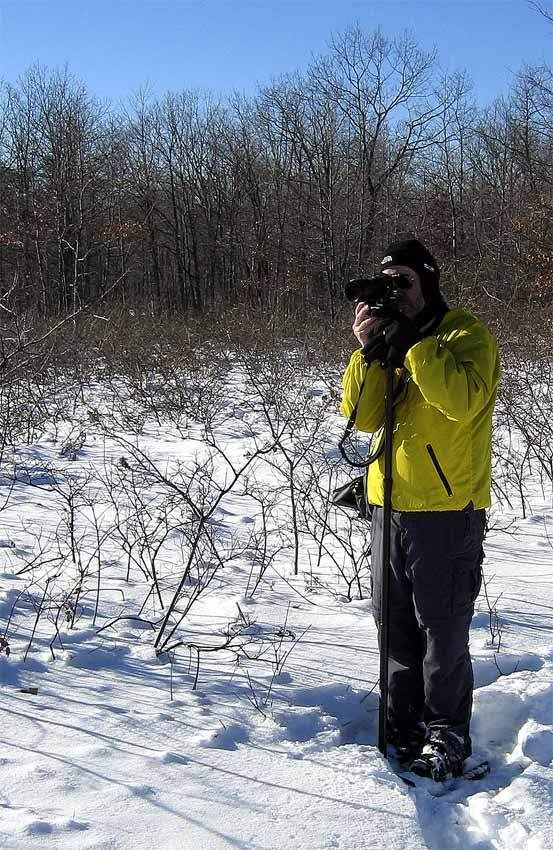
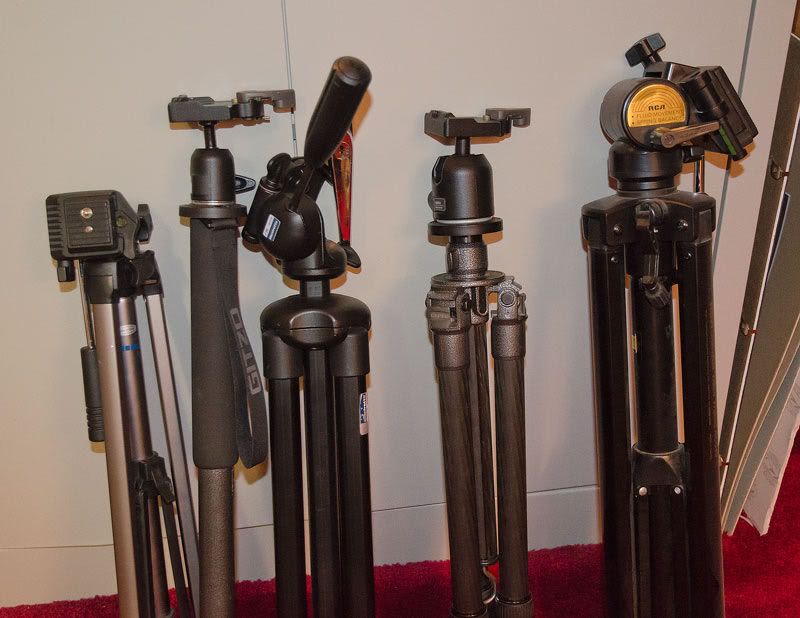
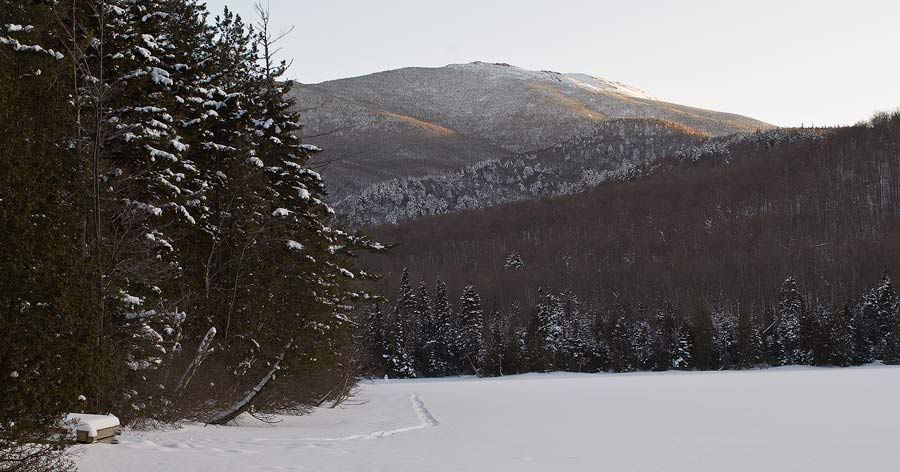
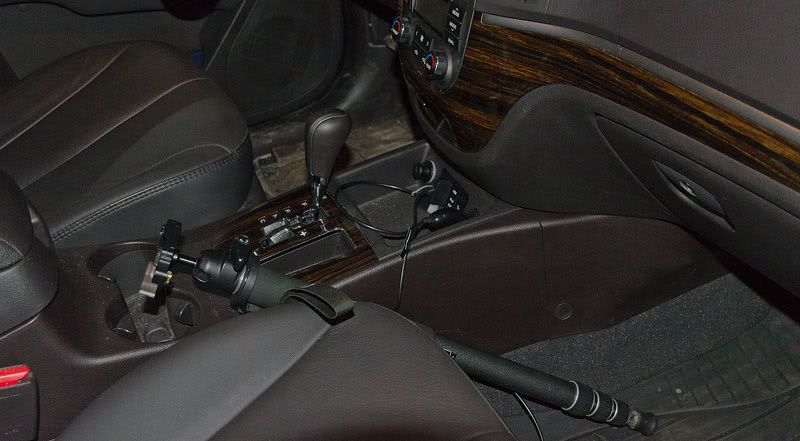
In early March my wife and I spent a week in the Adirondacks. I brought my typical travel kit including my Fujifilm X100V and my XE3 with a variety of lenses. I never got them out of their bags. When skiing or snowshoeing, I would merely take my small Manfrotto tripod and the smartphone mount, and shot with the Samsung exclusively. I have been doing that ever since, in part with this article in mind.

Chairs at the Pub ( Samsung Galaxy S20 EW 5G)

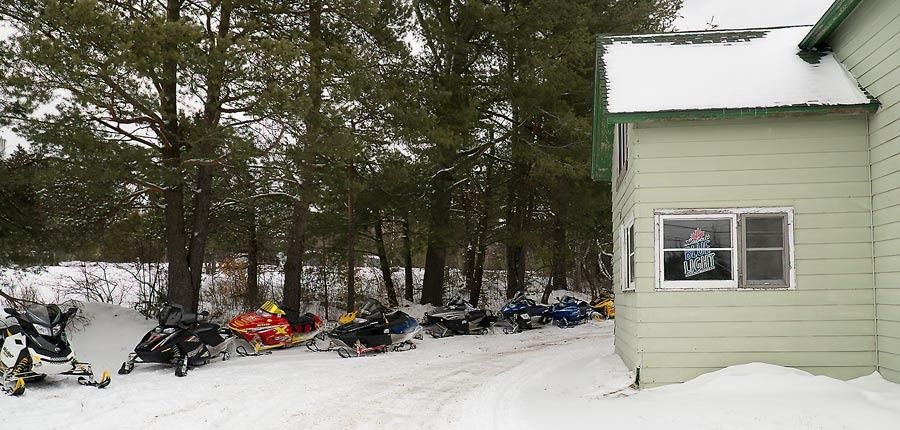
I have to say that I didn’t really miss my Fujis. Part of this, however, is that I’ve been photographing the high peaks region in early March for so many years, it’s hard to find novel scenery. This was thus an interesting new challenge.

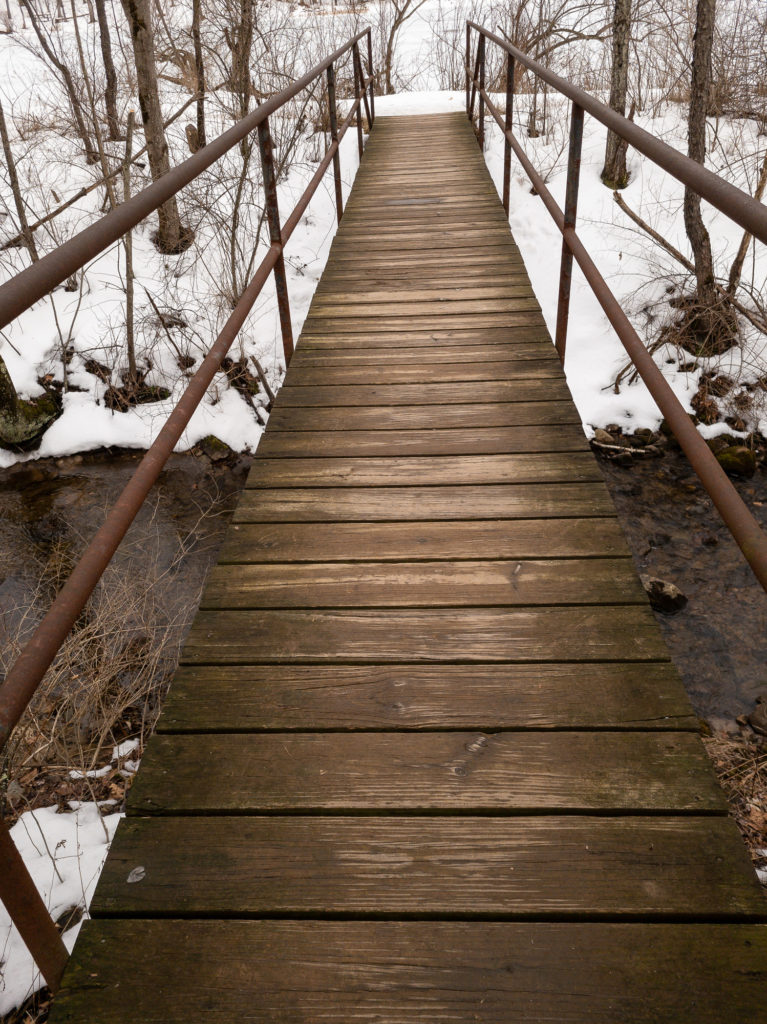
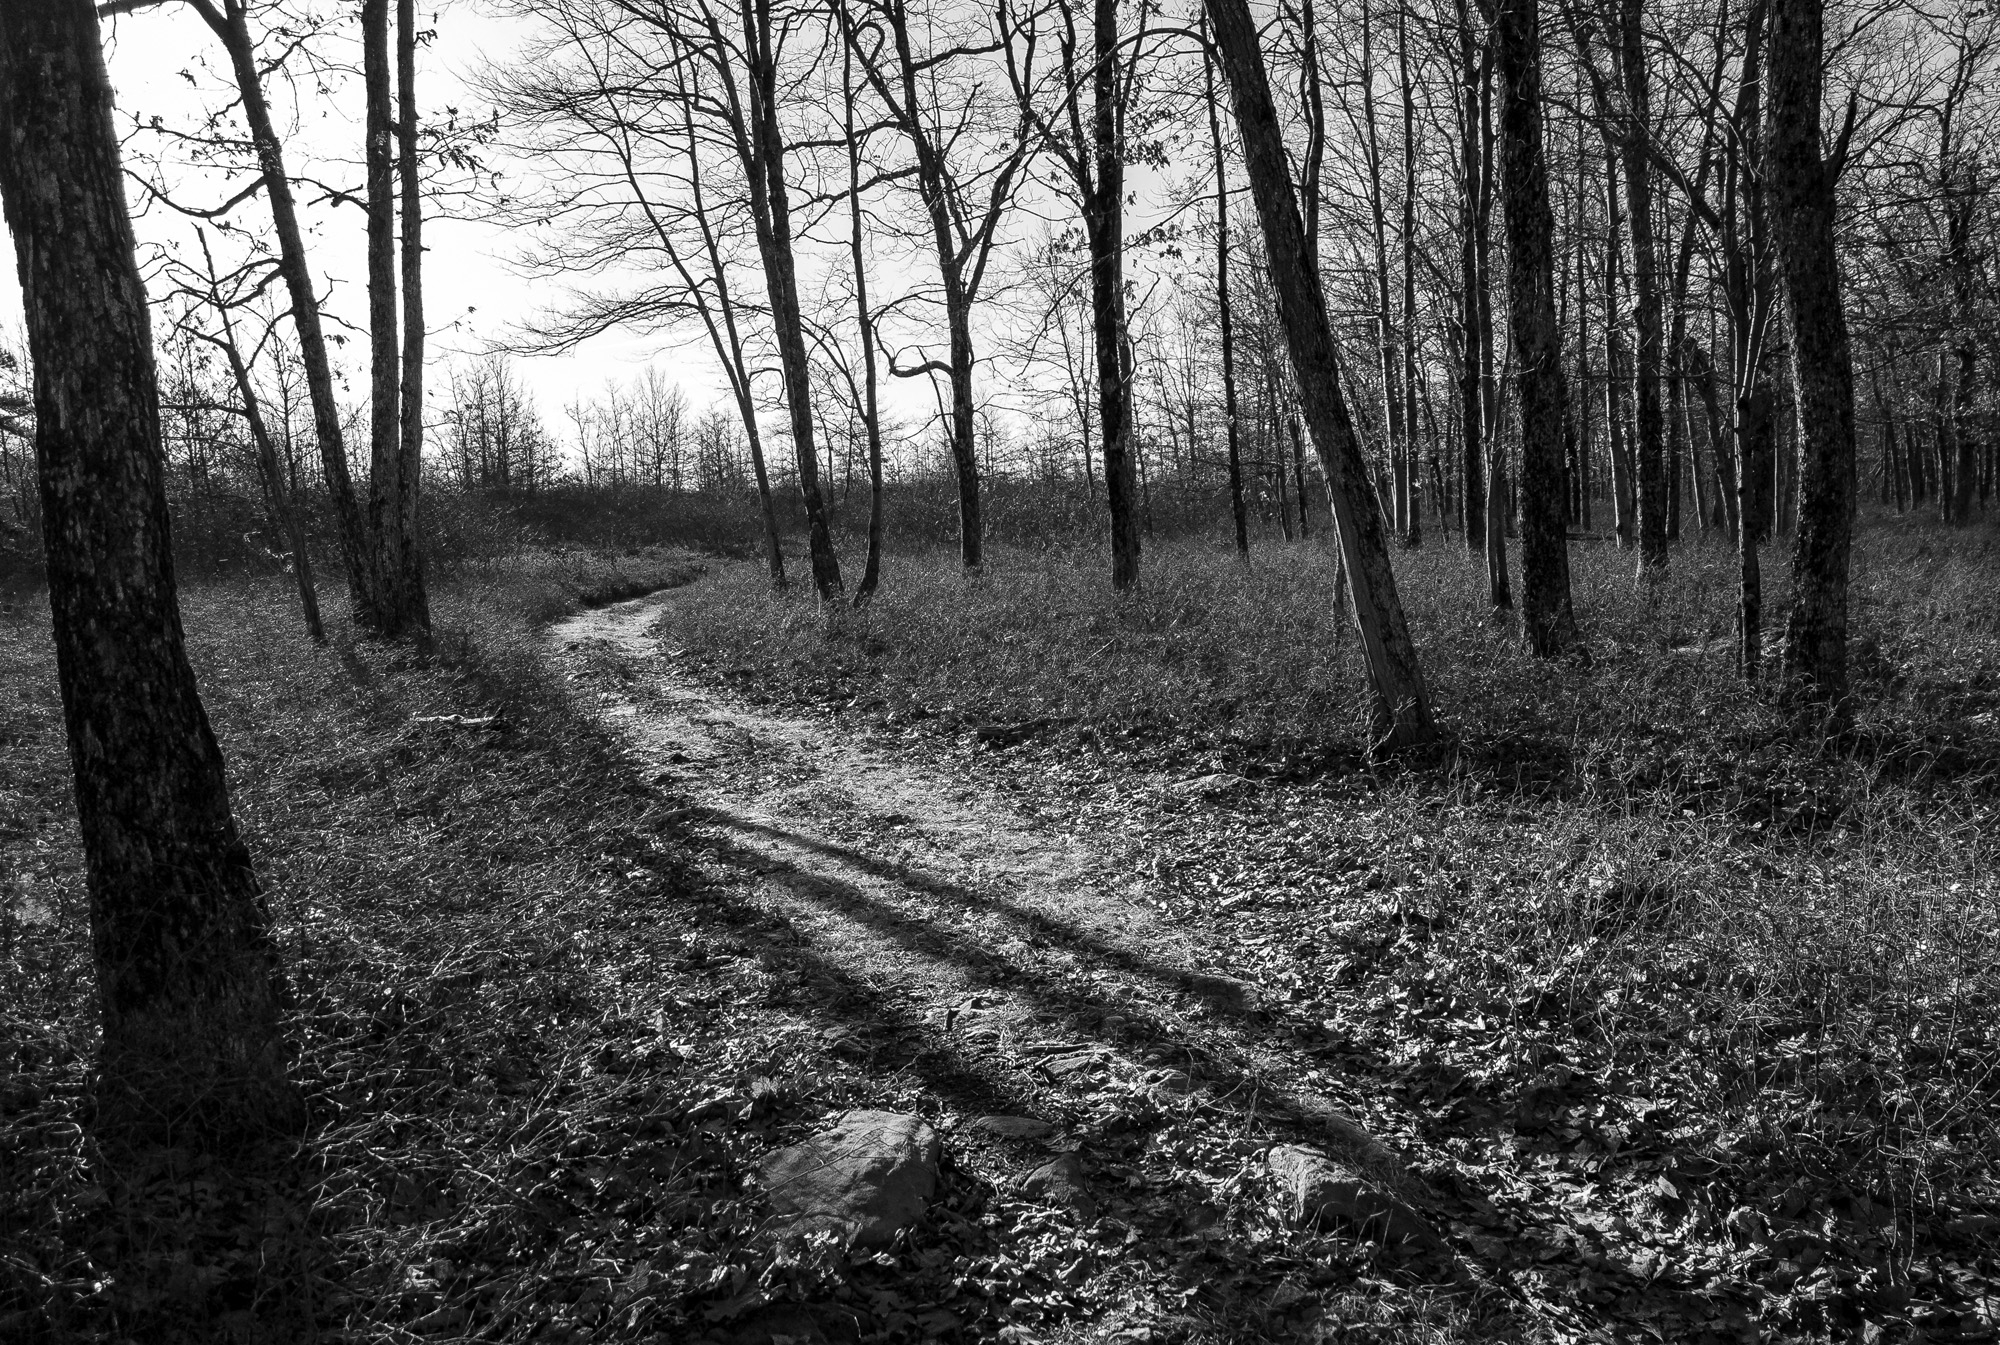
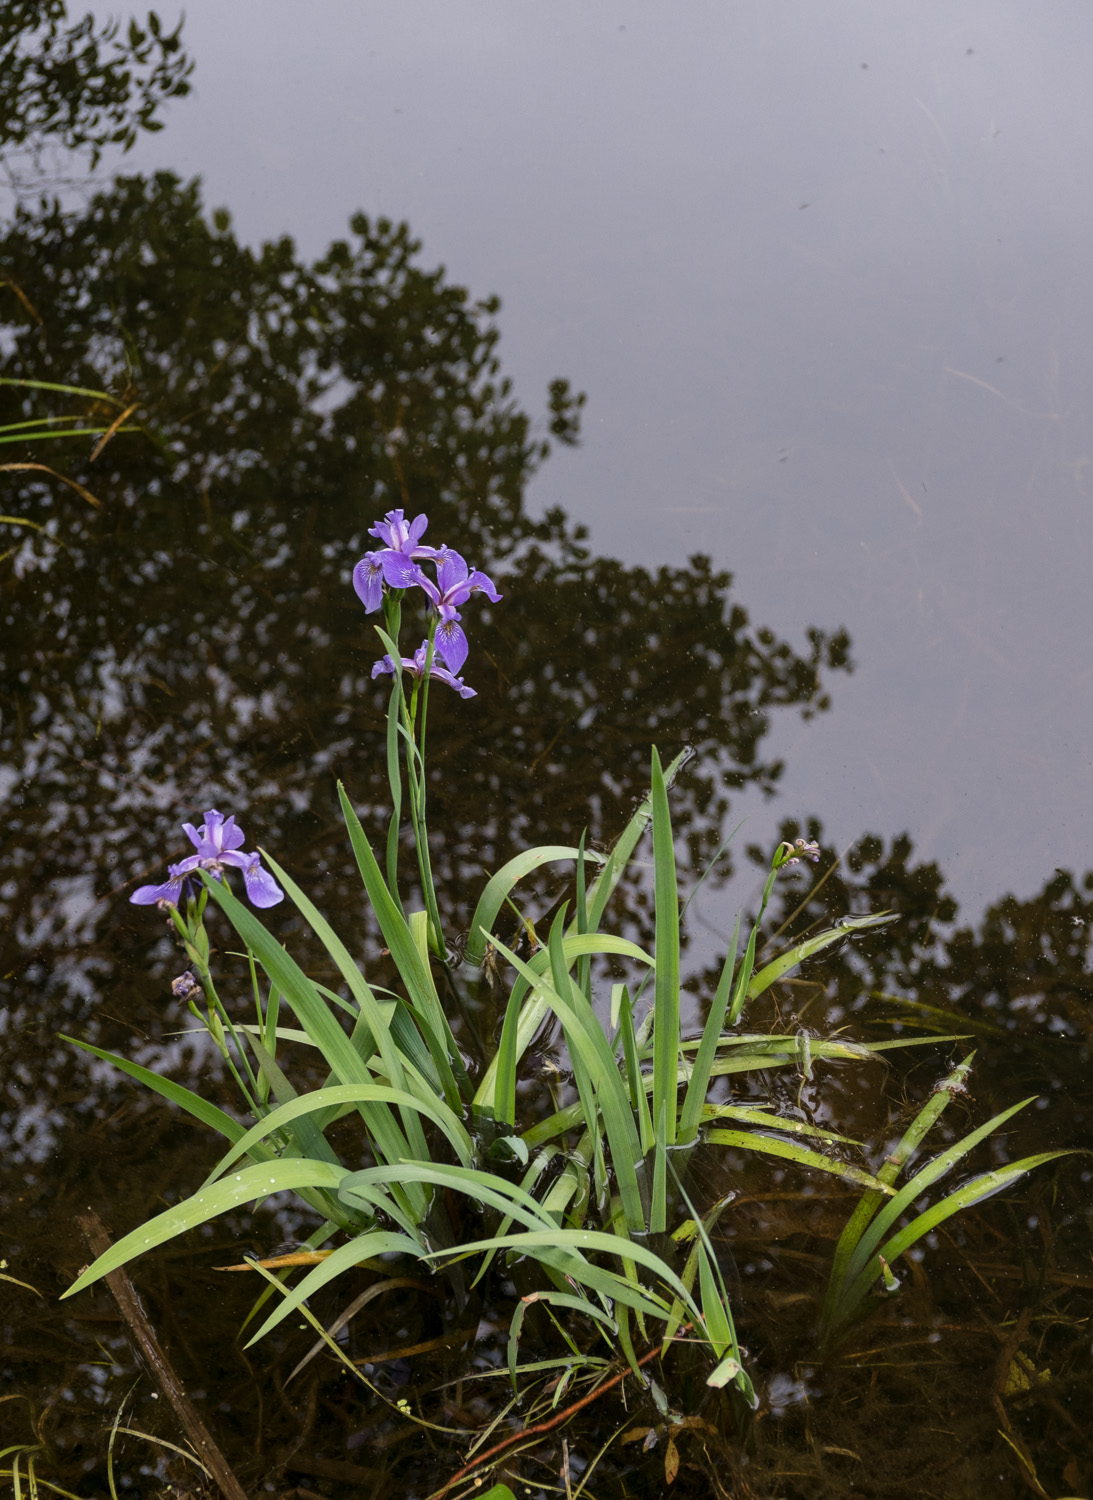
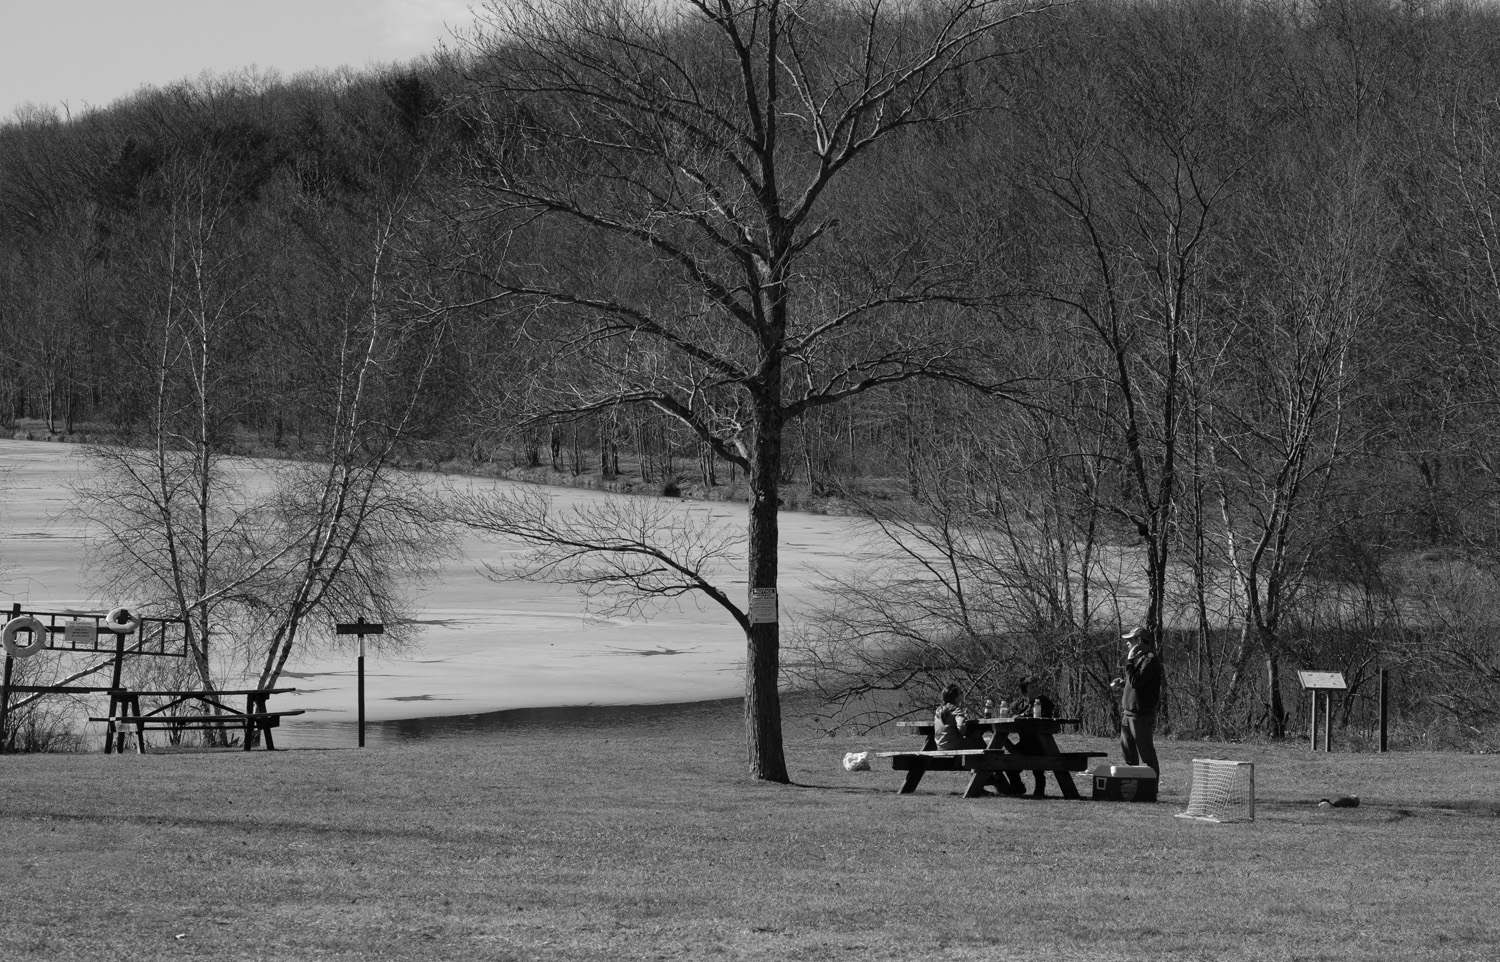
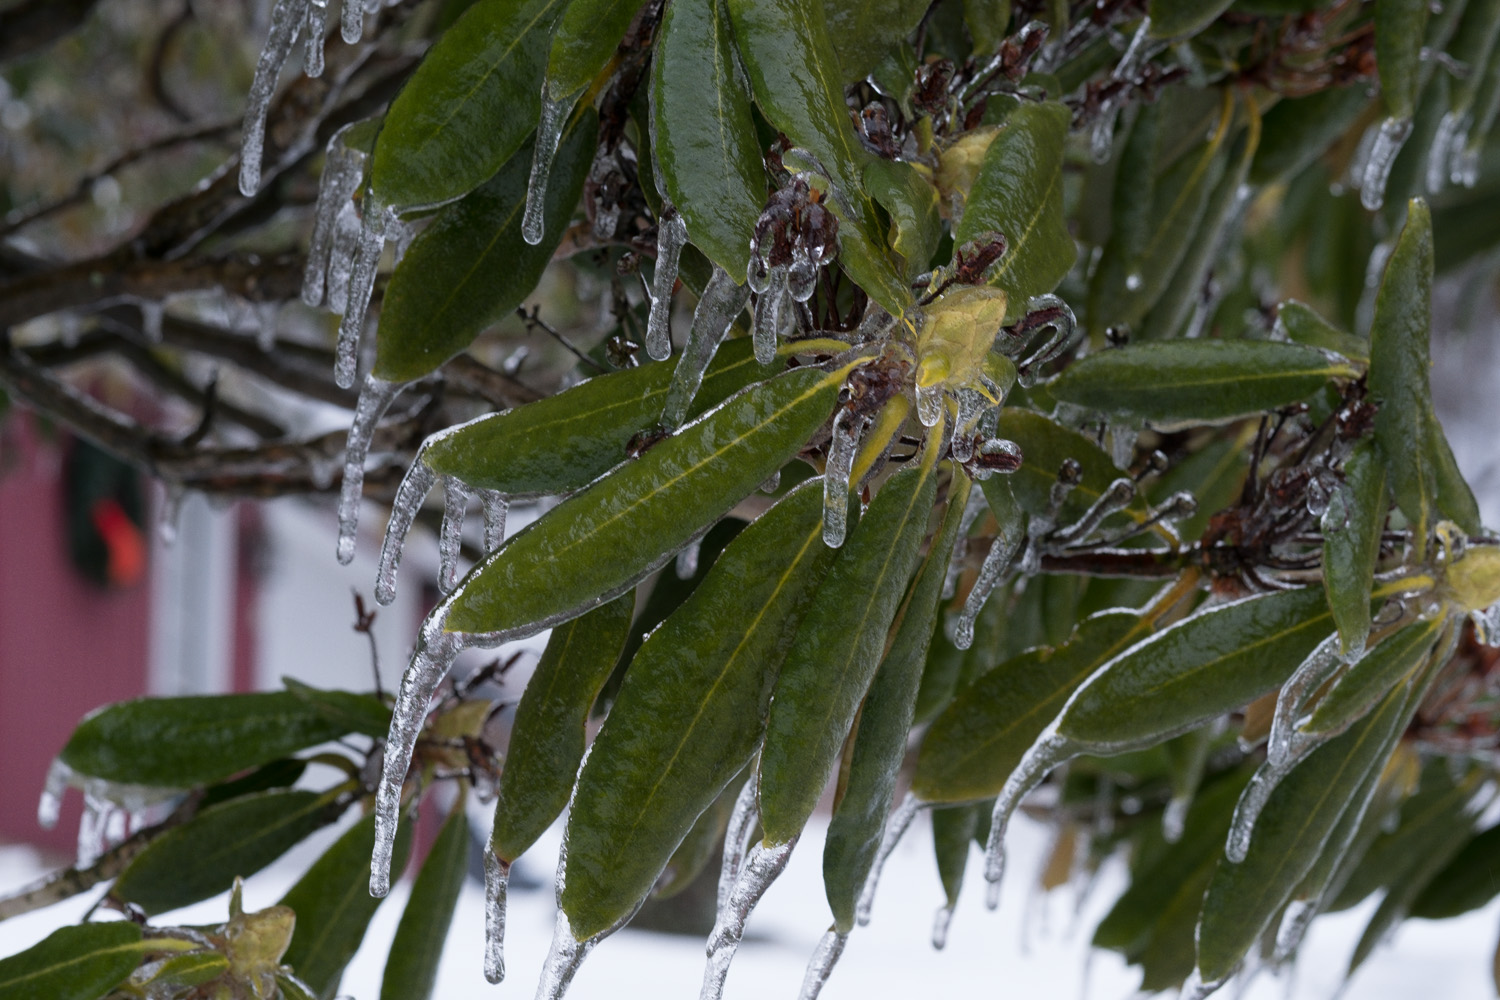
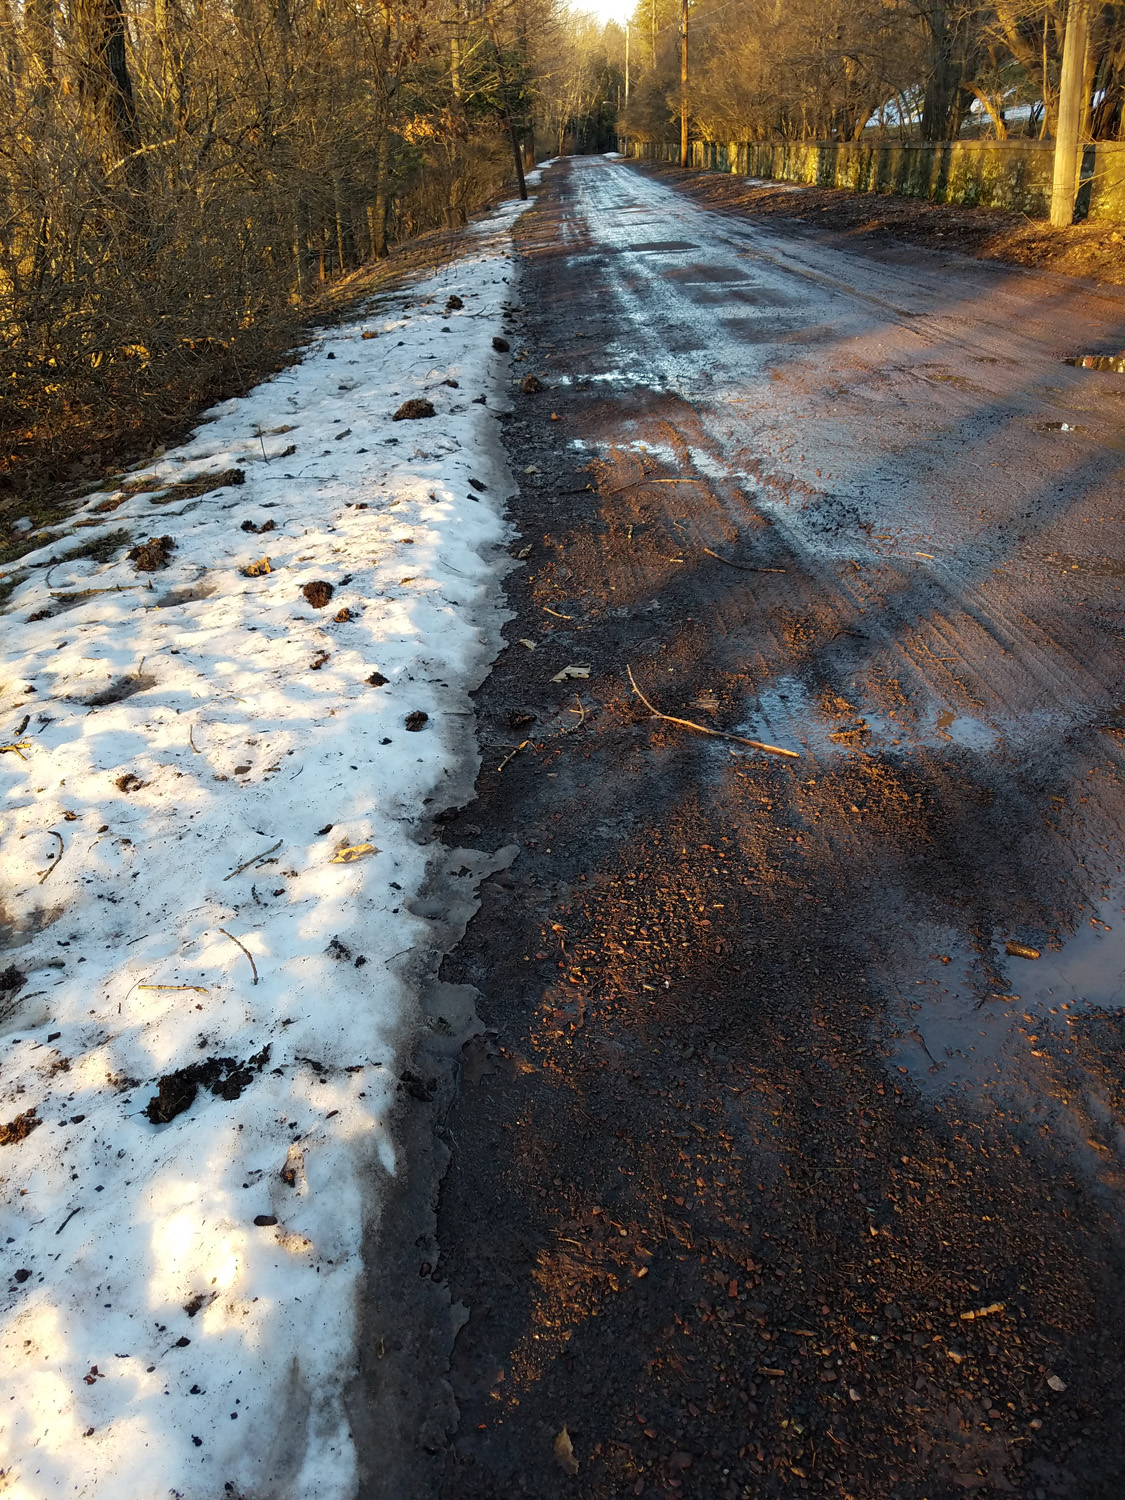
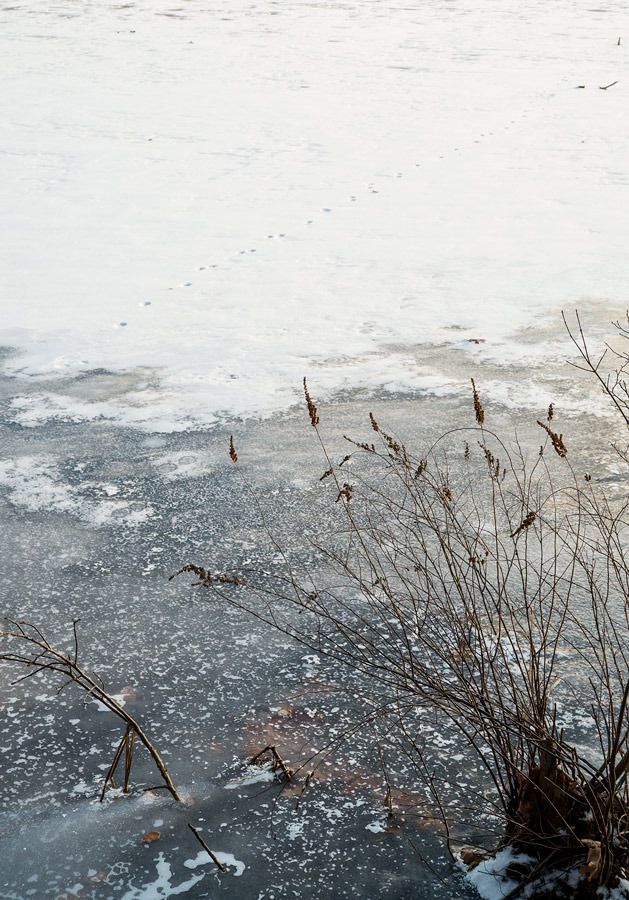
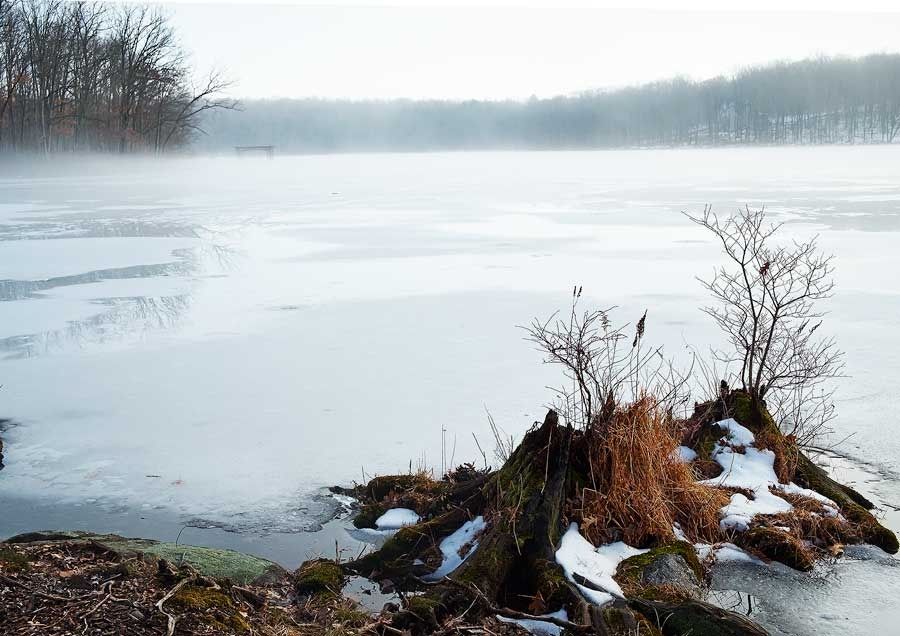
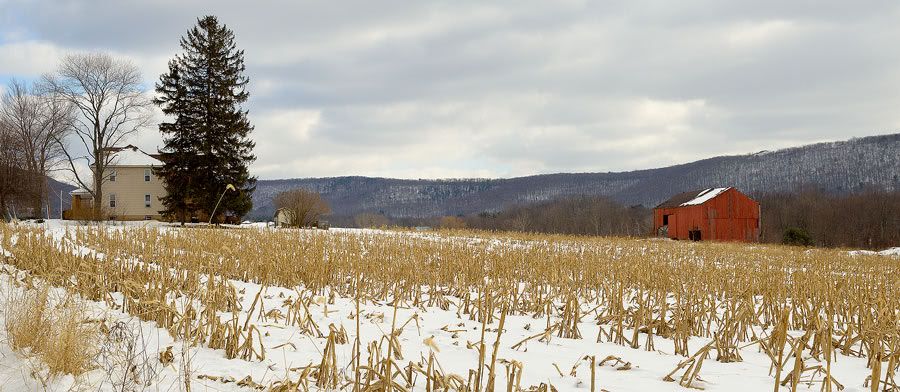
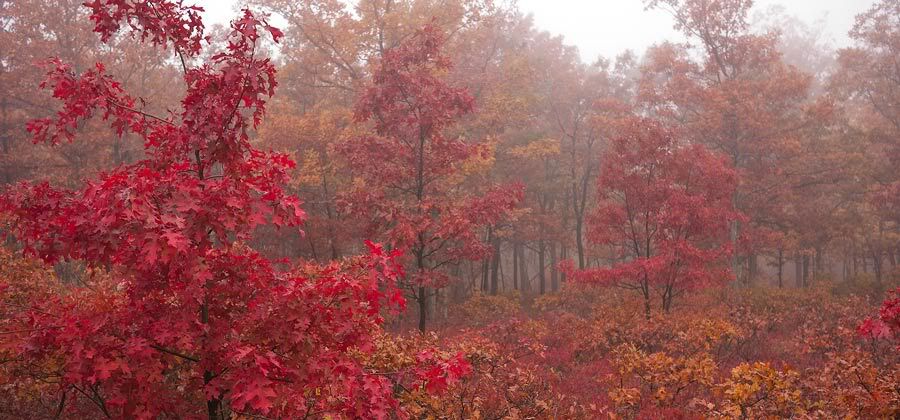
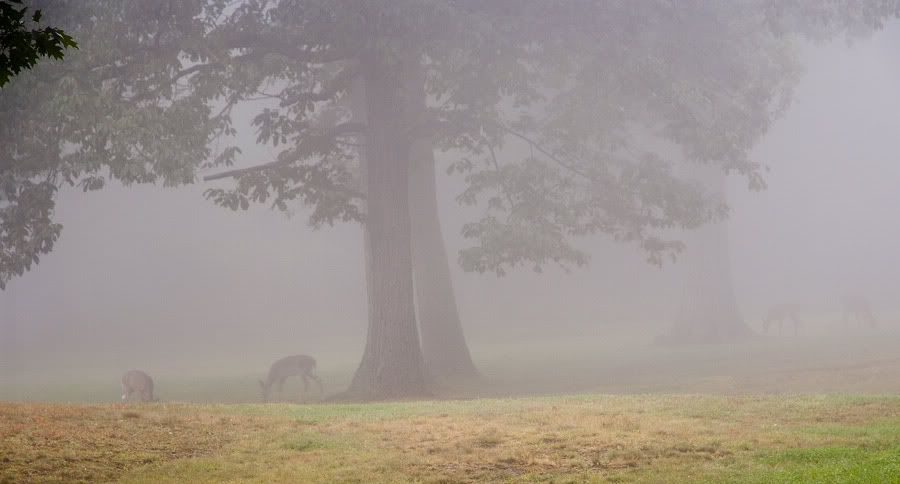
Once home, I continued with the exercise playing with the bleak, early spring scenery as our snow finally melted away.

The last Bit of Snow ( Samsung Galaxy S20 EW 5G)

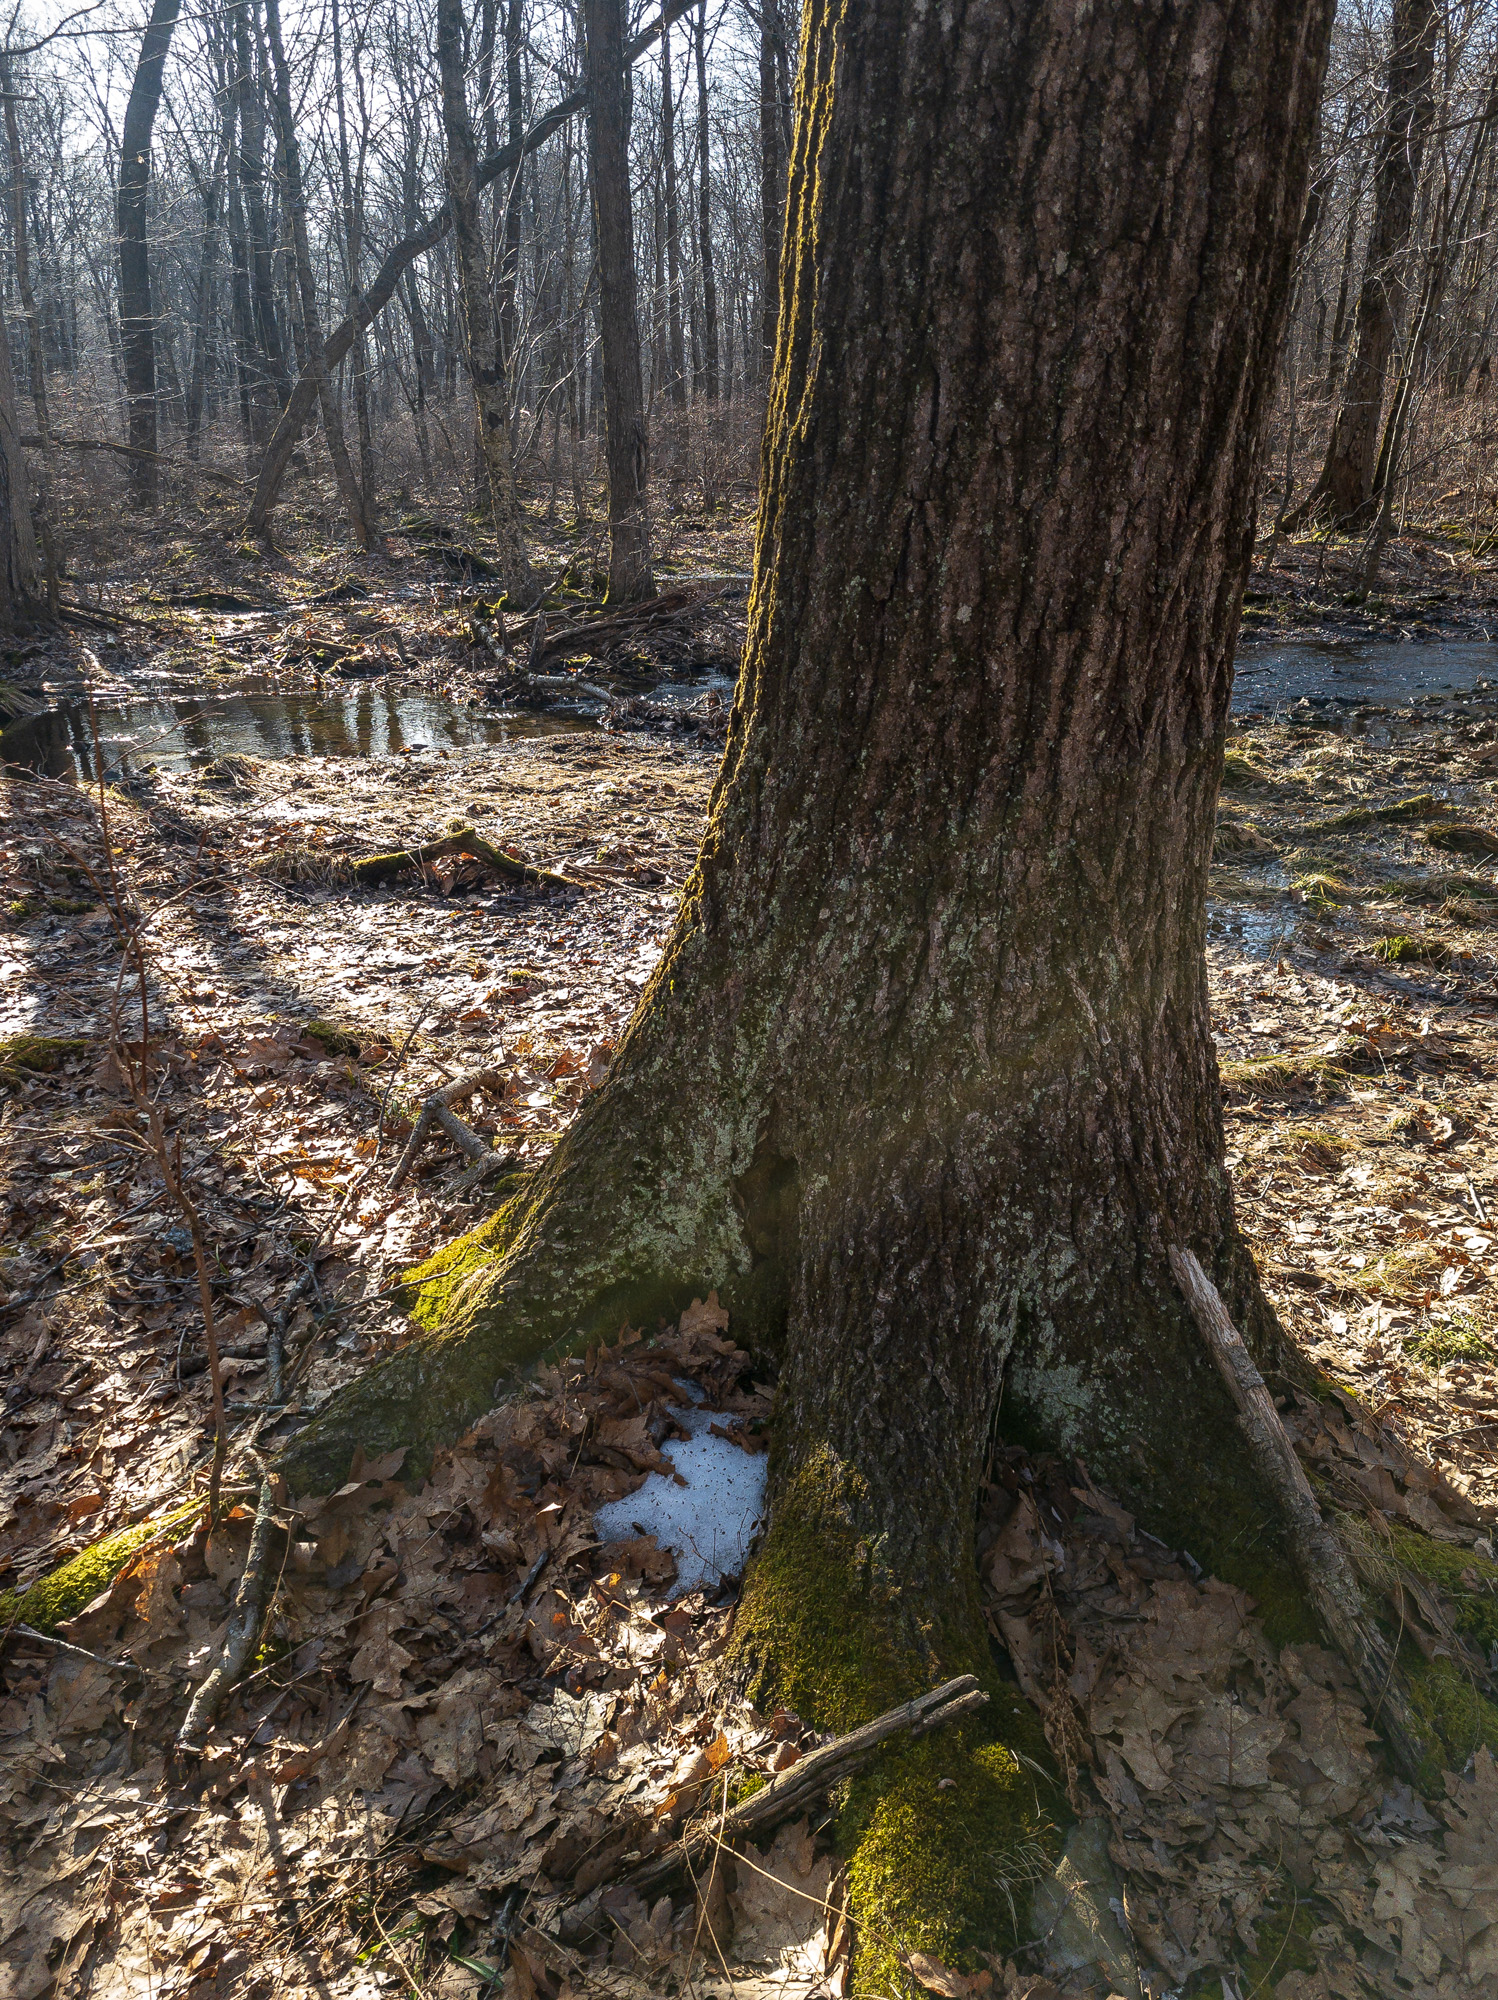
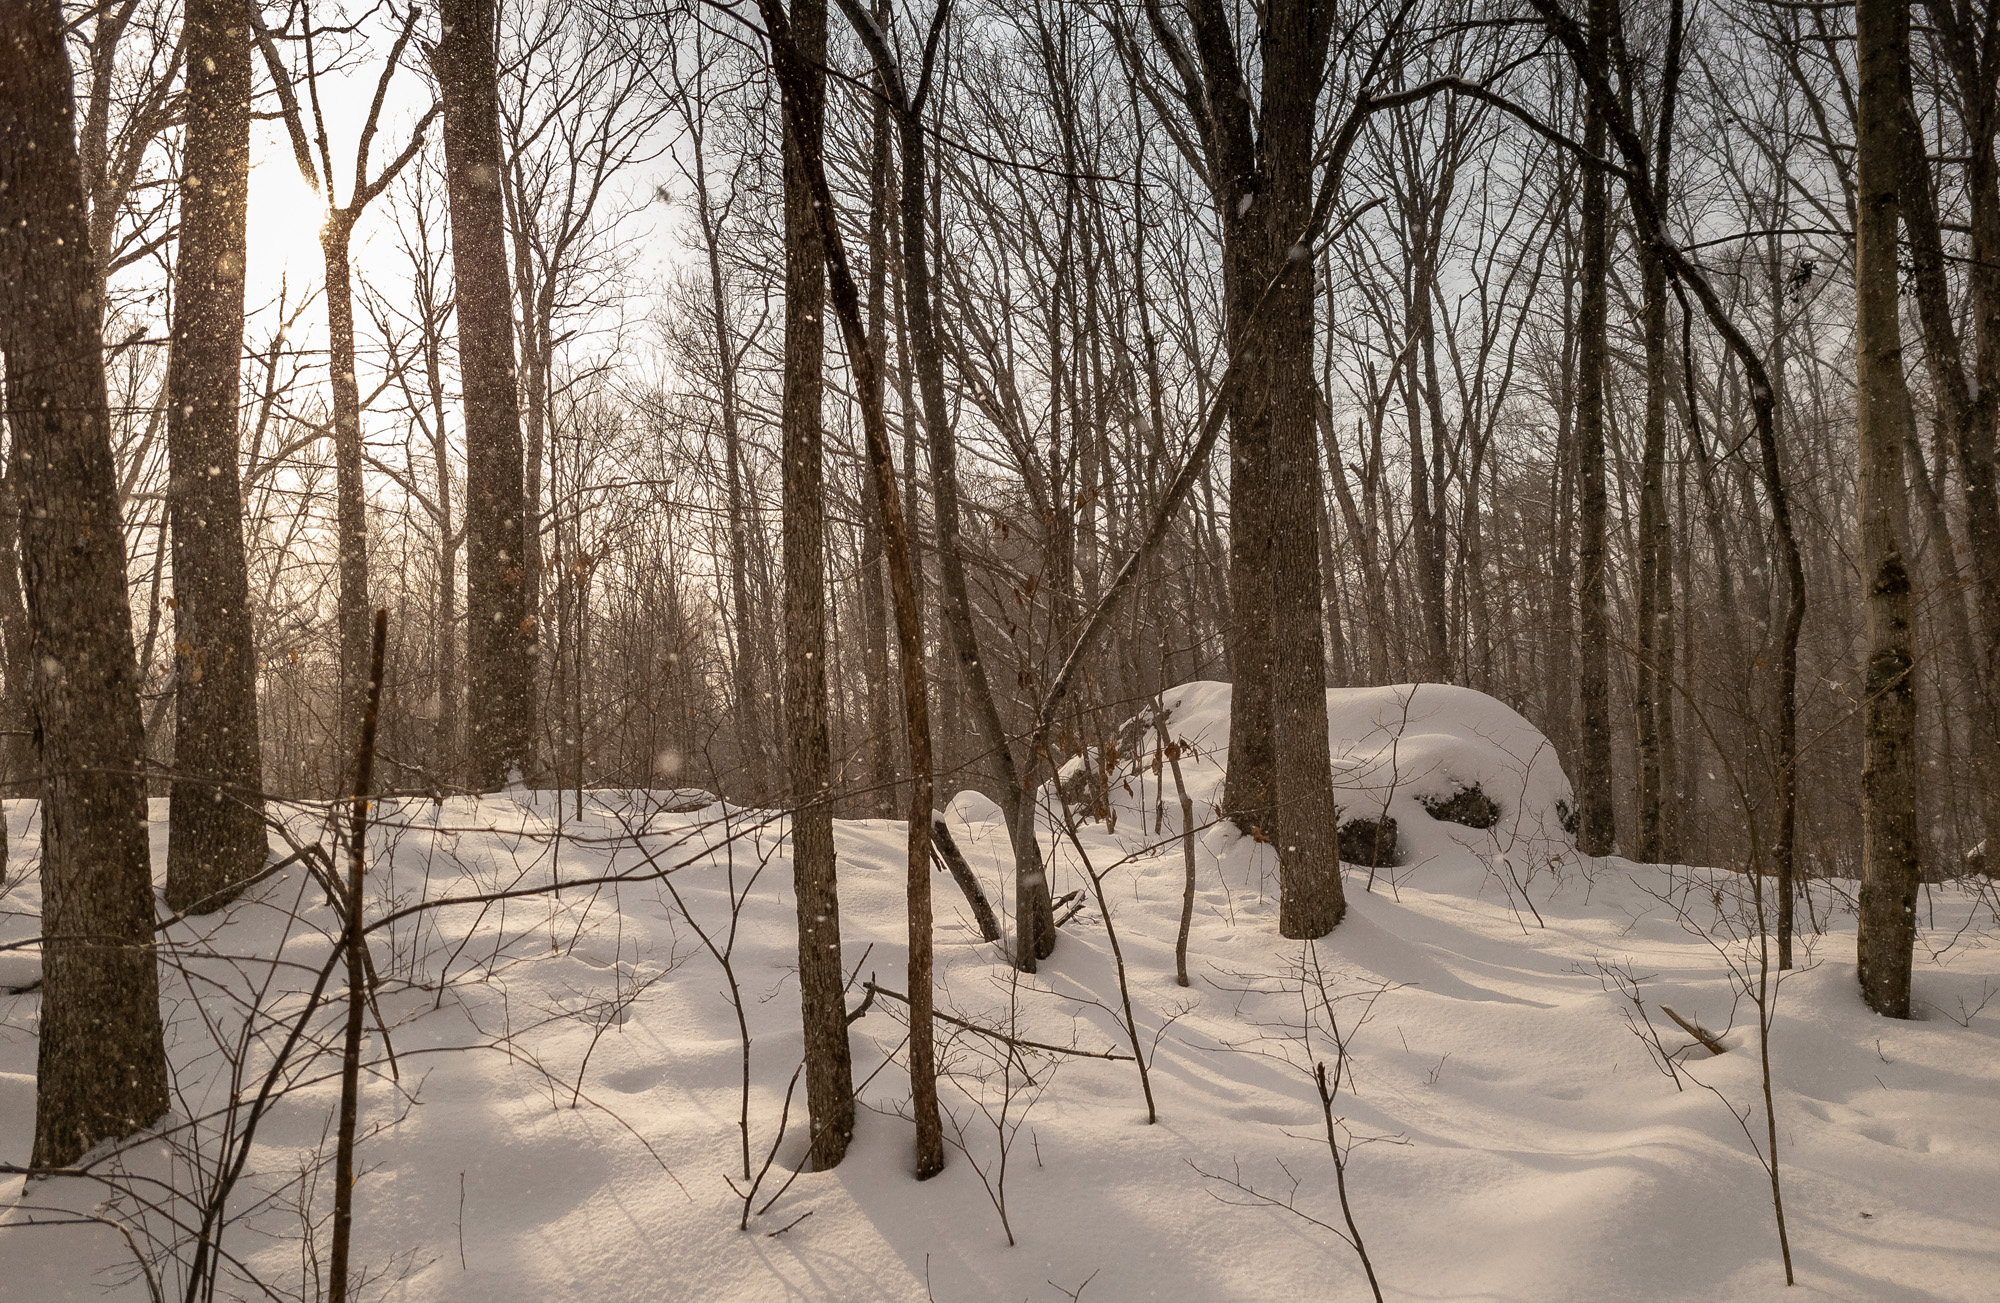
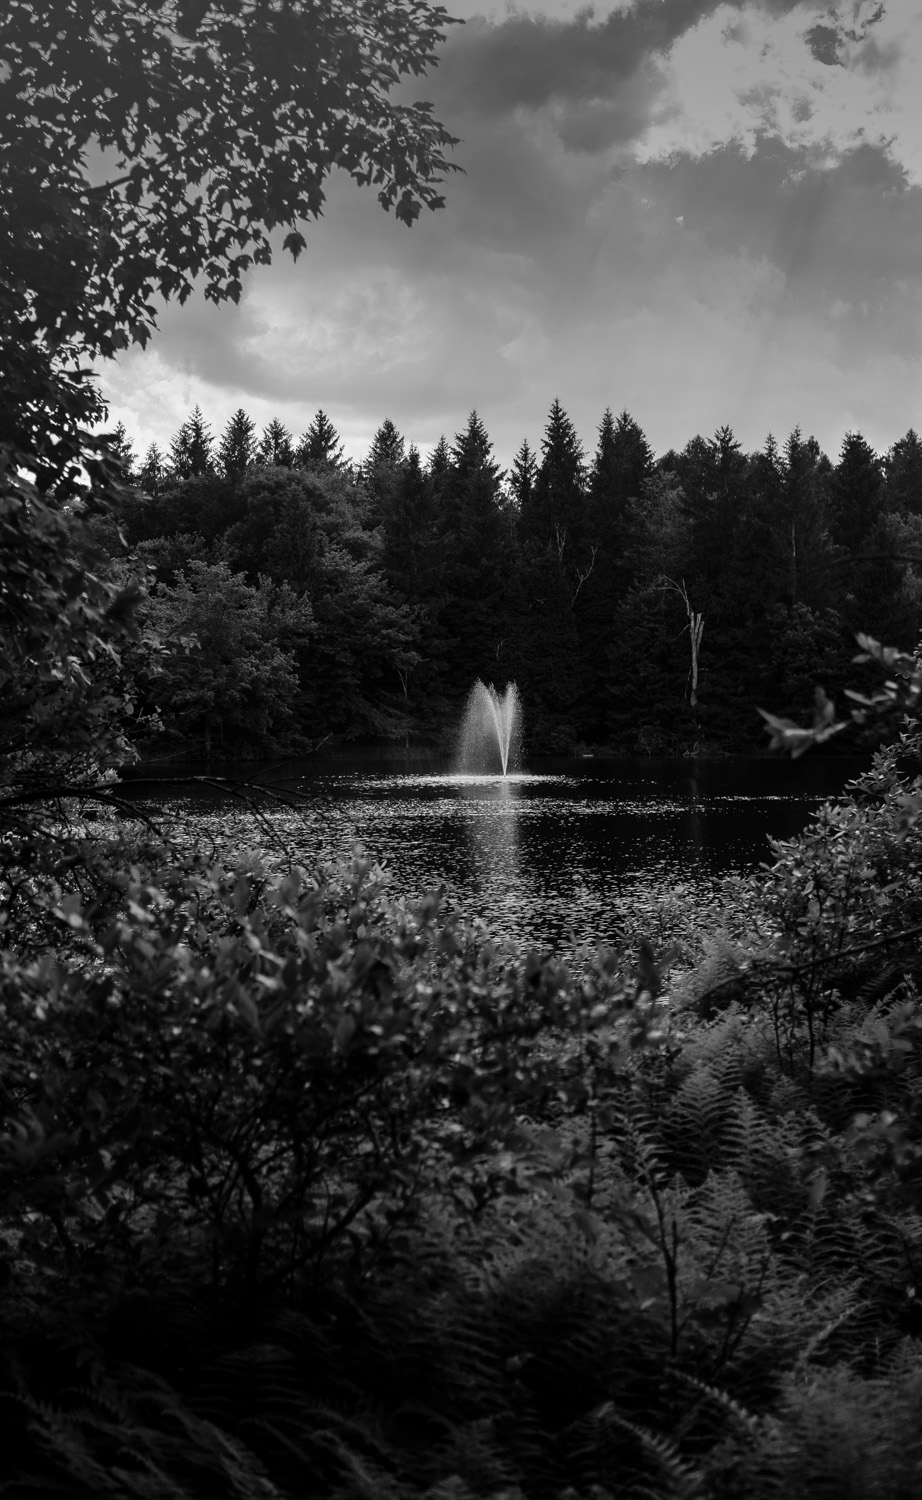
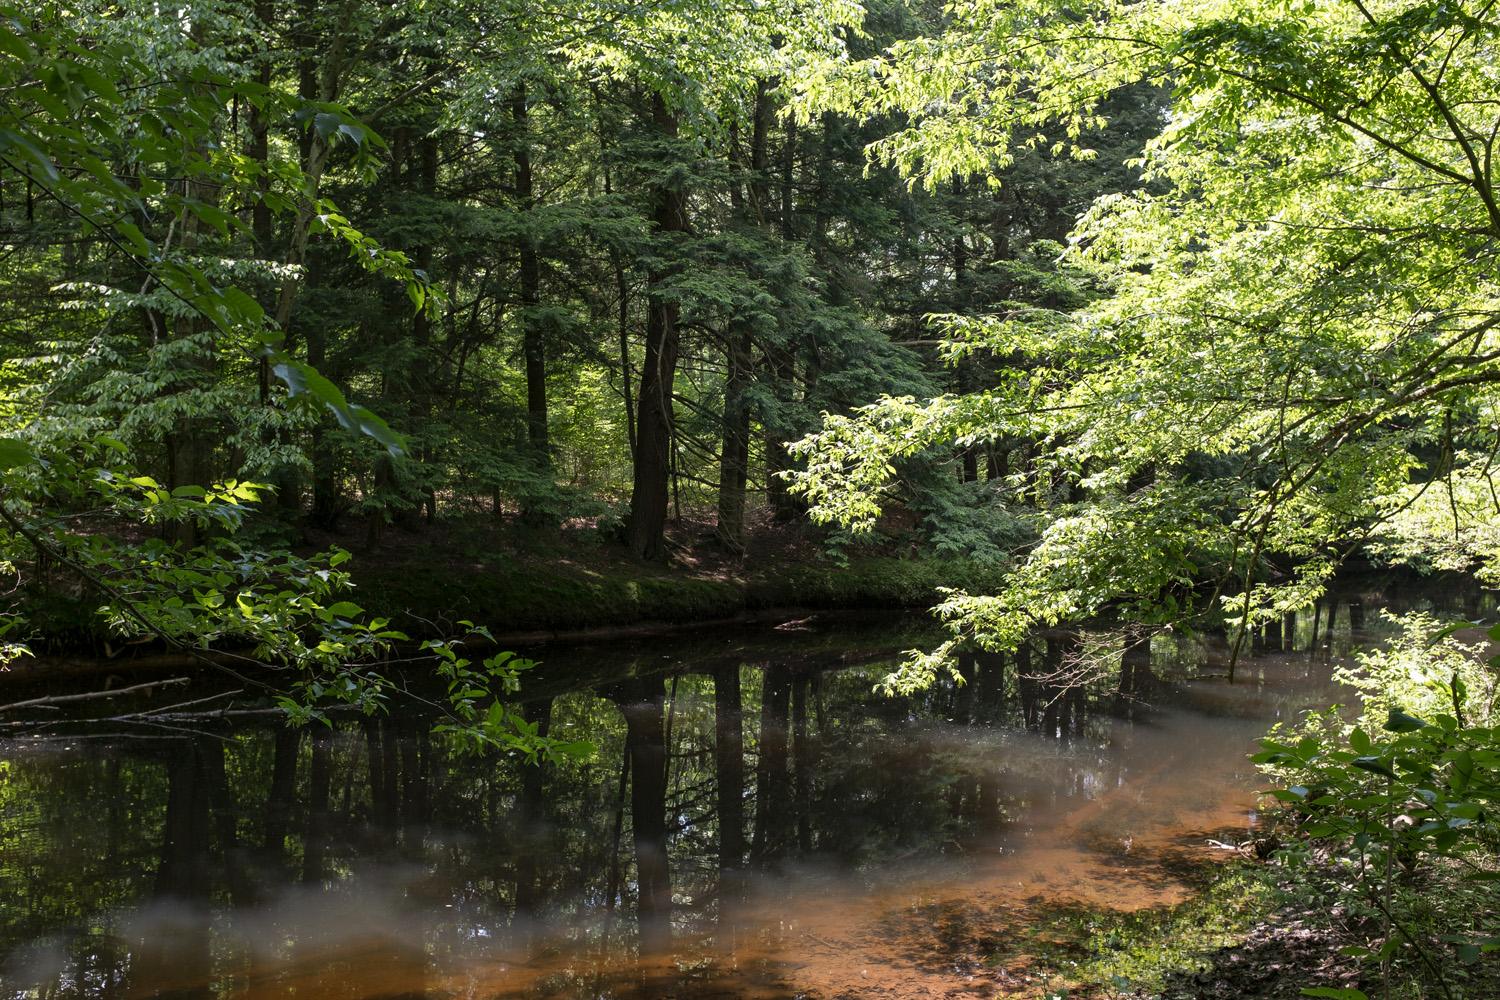
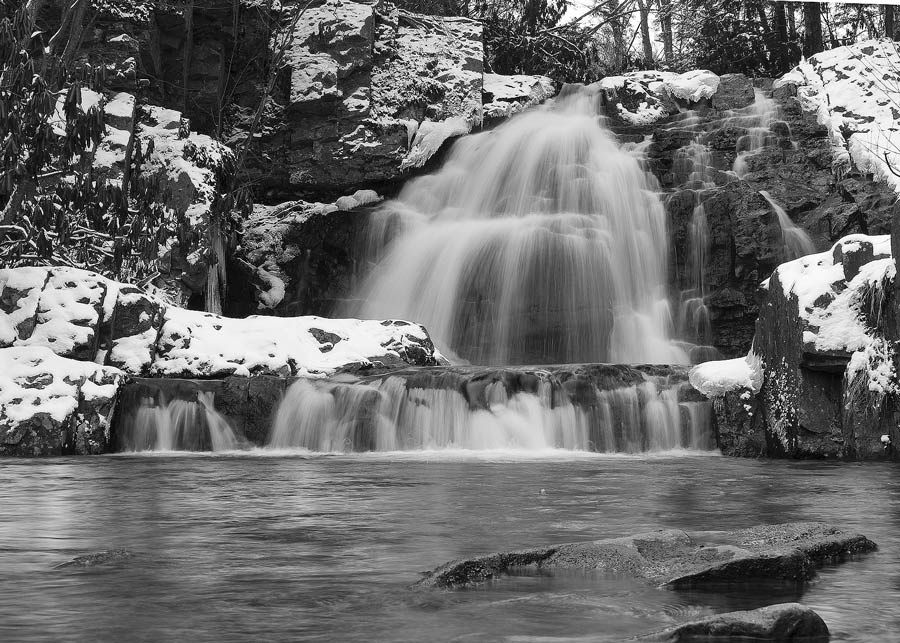
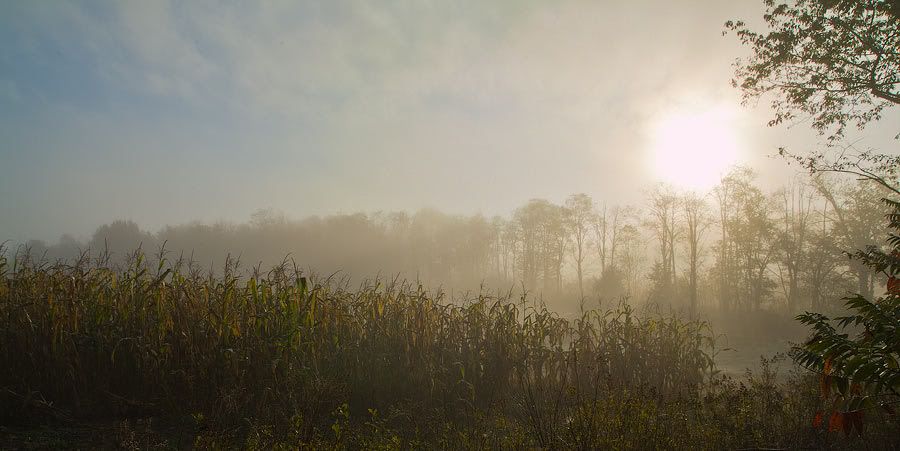
This is a really good sensor. Many of these images you will note, were shot into the sun with prominent shadows. Better digital sensors have several qualities. One of them is dynamic range, which in part feeds into their true resolution.

Dynamic range describes the ability of the sensor to capture very bright scenes, and deep shadows, but still retain detail when the images are edited. Small pixel phone sensors have traditionally been terrible at this. This sensor handles it brilliantly, certainly as good as for instance my 2009 vintage Panasonic GH1, a much larger sensor interchangeable lens camera (also 12 megapixels).

March Barrens Morning ( Samsung Galaxy S20 EW 5G)

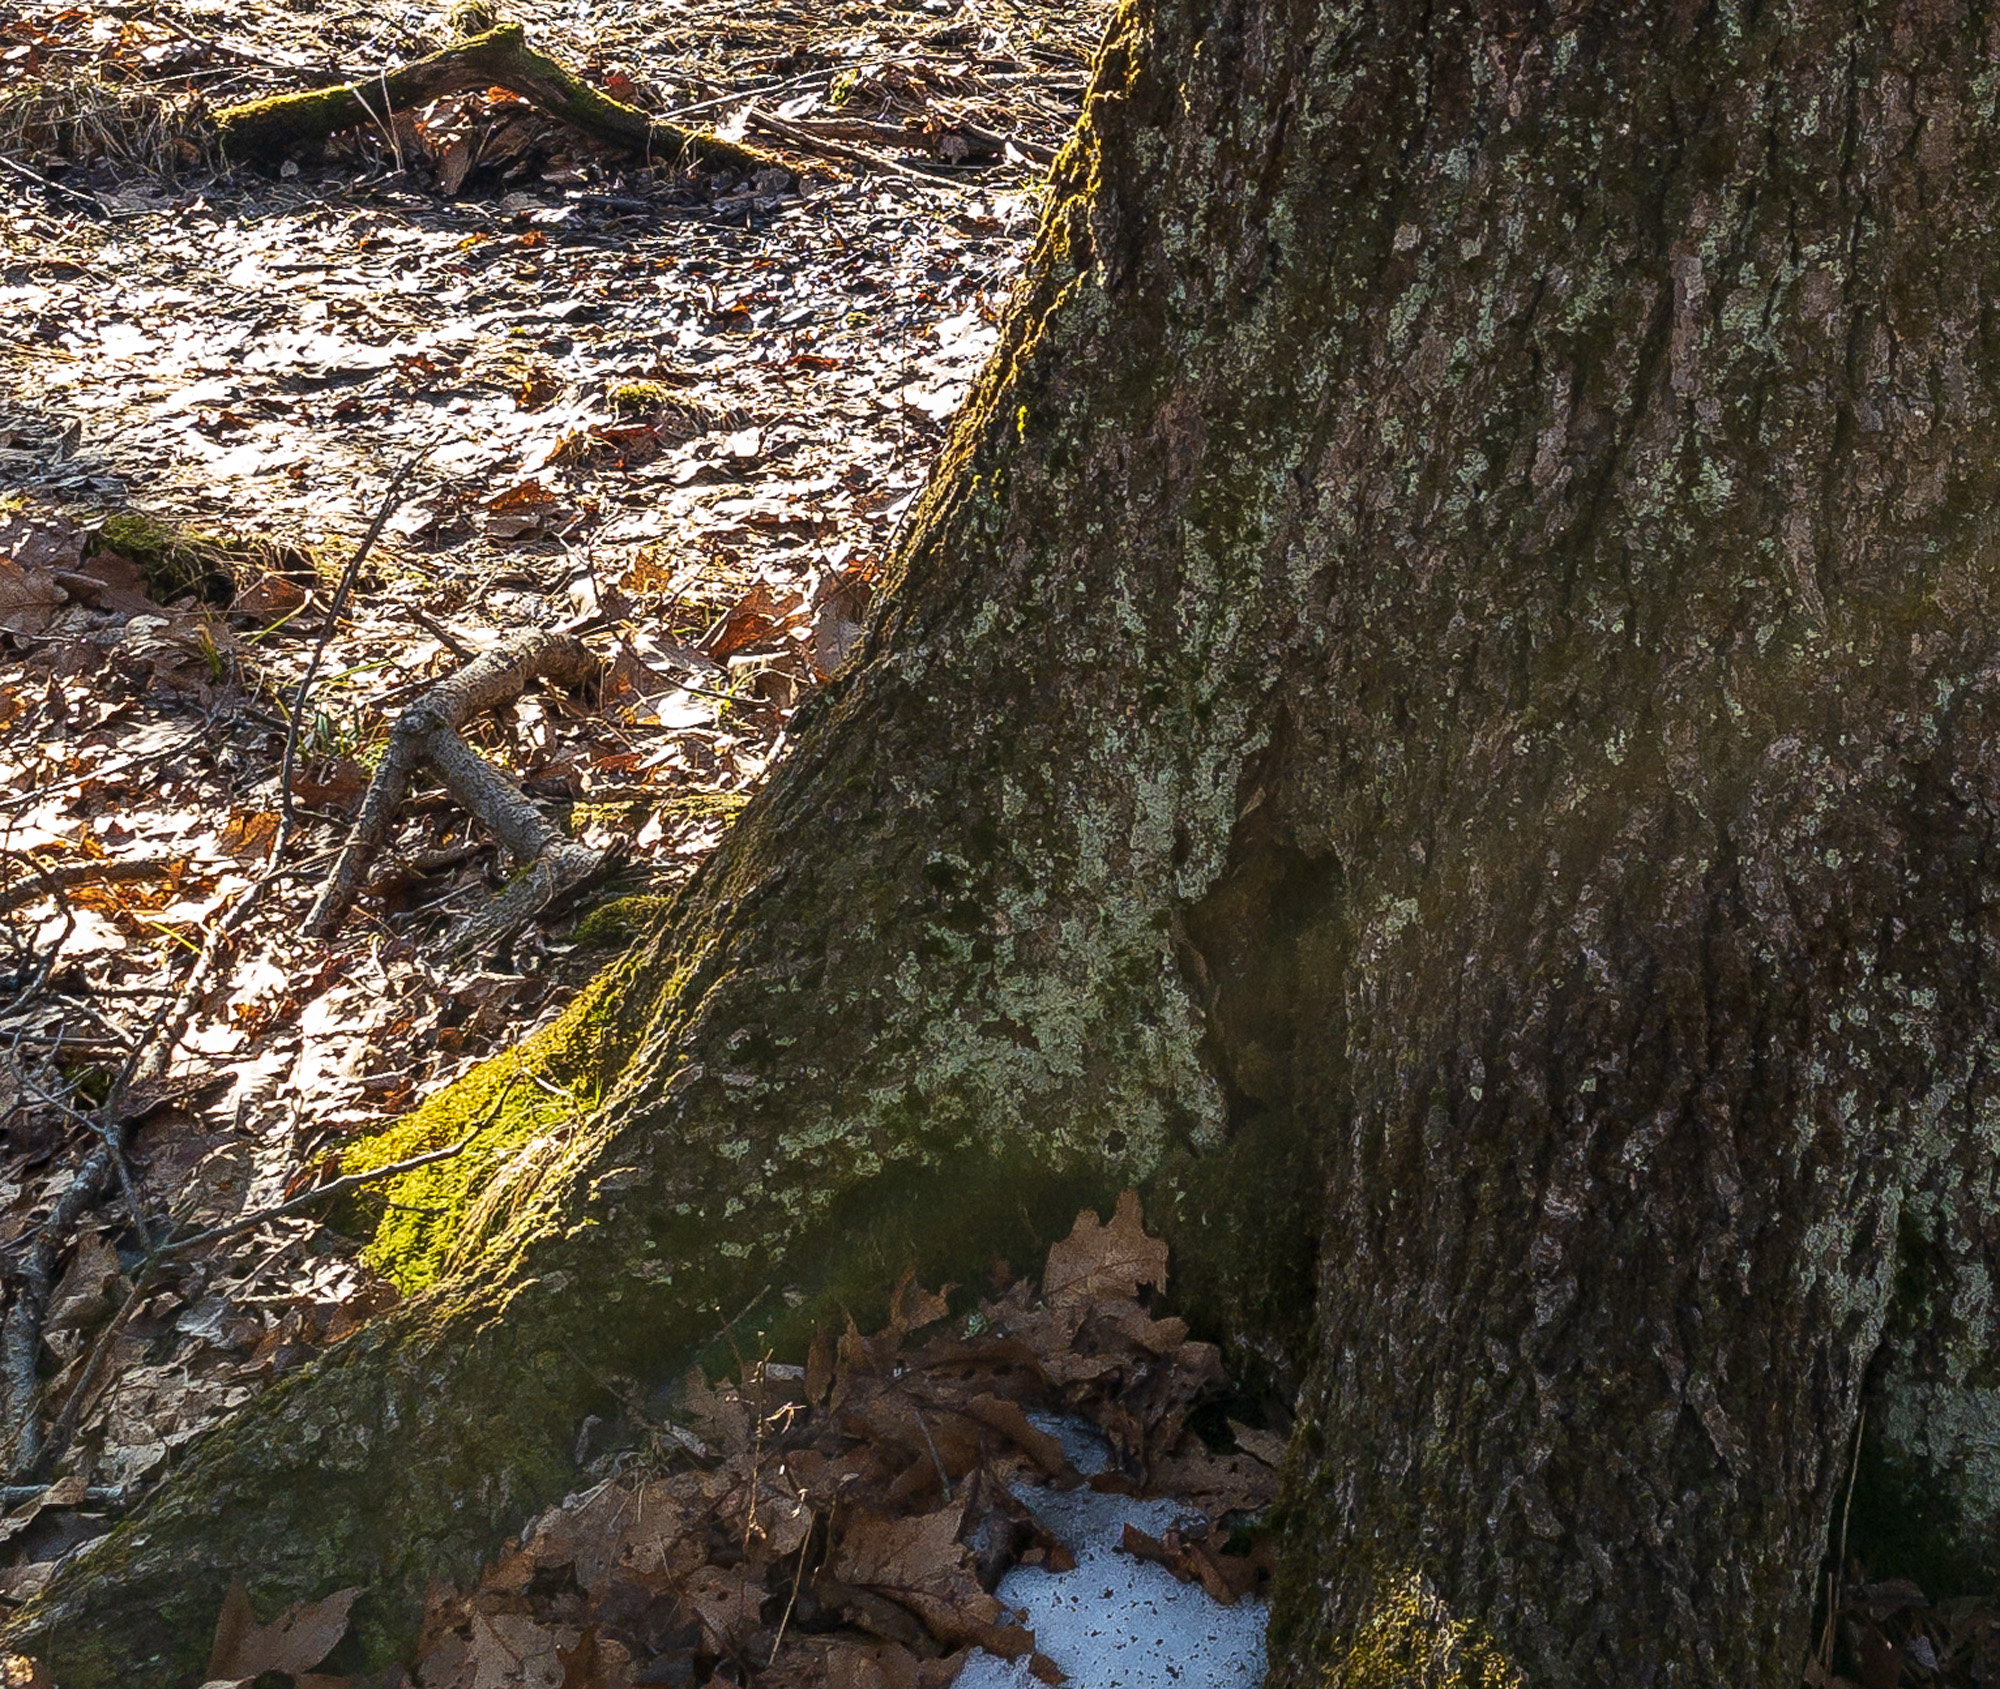
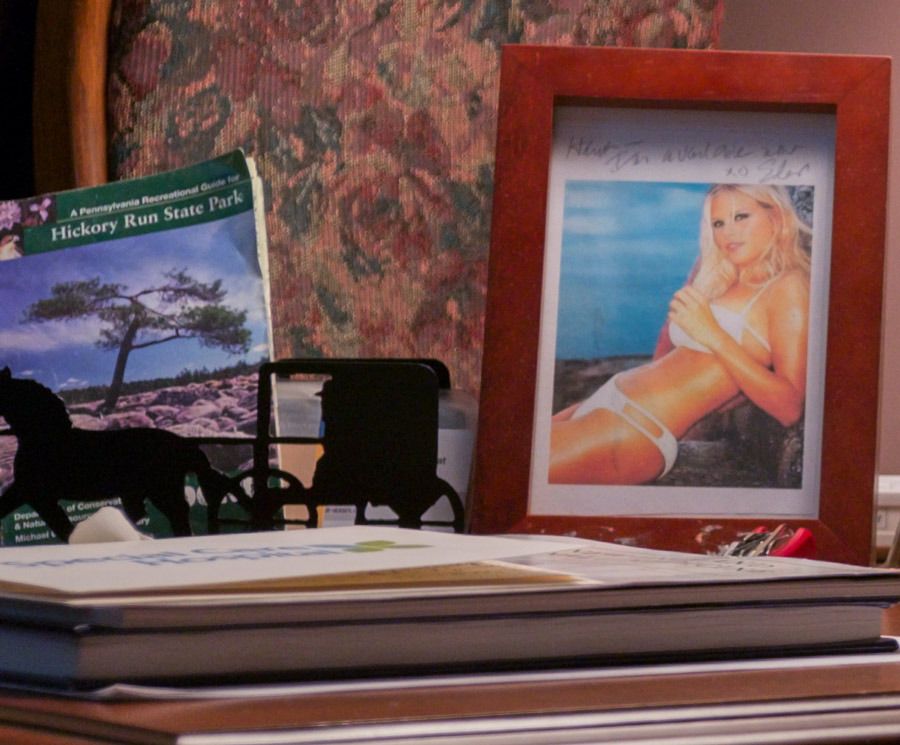
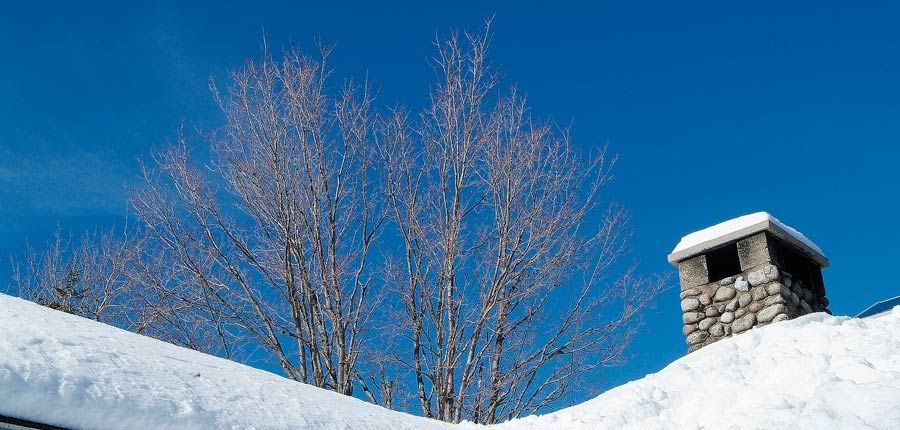
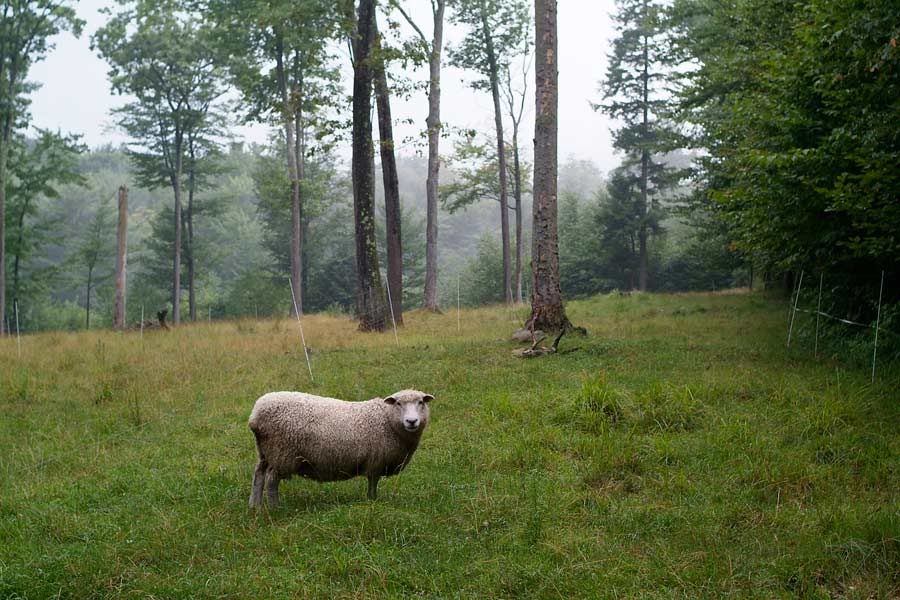
Another attribute of a good sensor is tonality. This describes the subtle gradations shades of gray, and of color. Earlier technology recorded shades in discrete steps makes the image look more like a painting than a photograph, especially when viewed in detail. More sophisticated sensors have much more subtle gradations. I would say this Samsung sensor does surprisingly well in this regard.

Melt out at Lake Flower ( Samsung Galaxy S20 EW 5G)

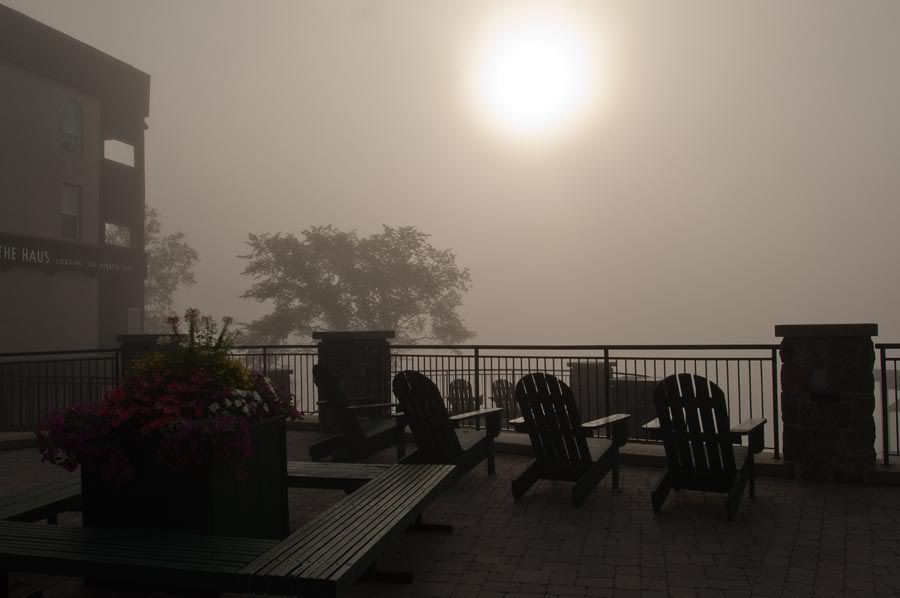
I’ll offer one more thought. No one really talks about the lenses in these tiny camera modules, but in the case of this Samsung S20, there is little to criticize. There is some lens flare, and given the lack of any lens shading, but it is pretty well controlled. And if there other lens distortions that can be measured, they are well hidden in normal usage

April First on the Pocono Plateau ( Samsung Galaxy S20 EW 5G)

At any rate, I think I’m done with this experiment. I’m going back to my more serious gear as the Spring season presents more photographic opportunities.

But it’s nice to know I’ll have the Samsung just in case.

As always, I’d Be honored if you’de share.

Header image: Wind and Snow( Samsung Galaxy S20 EW 5G)

The X100f after Four Months of Use.

Fountain Lake Scene (Fujifilm X100f, TCL X100)

It has been almost 4 months since the UPS man walked up my driveway, and dropped off my X100f.  It has become, as was its predecessor the X100t, my most used camera body.  And over that period of time, I have definitely formed some opinions on the camera particularly compared to its predecessors.

I posted my initial review of the X100f here.

The “f” model  X100 some ways is the most revolutionary new model, at least since the “s” version of this small range finder-like body.  It slightly larger than its predecessors, mainly to accommodate the larger battery of the other cameras in the “X” series.  I was concerned that this would alter the physical joint using the camera, but over the months the differences mean nothing.  And the convenience of packing one battery type for a photography job or trip is well worth whatever additional girth the camera brings.  I also like the idea that in a pinch, the camera can serve as a charger for the pool of batteries either in a car or at home.

Marathon Couple (Fujifilm X100f)

I have been using the camera a lot with the TCL  X100 Mark II, which automatically changes the camera setting to reflect the change in the field of view (35–50 millimeters).  This lens, like its predecessor, is optically excellent, and now I don’t forget to change the camera setting.

I’m pleased with the autofocus performance in general, but I am sometimes frustrated by the facial recognition, which is somewhat inconsistent even shooting multiple images of the same scene.  Sometimes it just won’t pick up the face.  It would probably be better, to turn it off and just use a focus point.  This is especially true since we now have the advantage of the joystick control.

Iris (Fujifilm X100f)

I’ve noticed a few other things.  The focus mode switch on the side of the camera seems to have had its actions stiff and somewhat.  On the camera’s predecessor, I actually had some gaffer tape over the switch to keep it in the “S” setting as I often found that it would move unbeknownst to me (I generally only use manual focusing for panoramas, and almost never use continuous focusing).

Evening at the Whiteface Club (Fujifilm X100f)

I have never been overly impressed in the past with the resolution improvement of the new 25mp sensor relative to its 16mp predecessor, but I think I’m noticing more shake artifact in images with the newer camera.  Maybe as I age my hands aren’t as steady as they used to be.  Still, in all, I don’t remember this with the previous bodies.  Nothing in the leaf shutter mechanism is changed to my knowledge, and the camera still has a nice soft shutter sound.

I was already a fan of the Acros black-and-white film simulation on my X Pro 2, and though I shoot in raw, I often develop images in photoshop with this profile.  To my eyes, it is relatively close to the camera-generated image.

Nescopeck in June (Fujifilm X10f, TCL X100)

Overall I’m extremely pleased with my new camera.  The X100 series has become like an old friend to me, and in my collection, even among the other Fujifilm products, it is the easiest to reach for what I’m going out and about.  It remains discrete and non-threatening and wonderful for event and street shooting, and with the extra resolution wonderful for landscapes.  Also with its soft shutter and built-in neutral density filter, it remains my favorite camera for moving water.

It’s,  going to get a lot of use over the next several years.

.


Another Weird Winter 2017

Picnic at Lake Francis

February Picnic at Lake Francis (Fujifilm X Pro 2, XF 55-200 f3.5)

Here it is mid-February, in the middle of another unusual winter in Pennsylvania. Ten days ago there was a crusty cover of snow on the ground here in the Pocono region. Unfortunately, an altitude related ice storm seven days ago wrecked the brief period of cross-country skiing we had enjoyed after a 9-inch snowfall.   This week, a 5 day period of >50-degree weather finished things off, cruelly teasing us into thinking that spring is around the corner (it is most certainly not).

Ski Trail, Early February (Fujifilm X-T10, XF 18-55mm f3.5)

I am somewhat heartened that this heat wave will not be fully expressed up in the Adirondacks, where I hope to be recreating in several weeks. Nonetheless, these lackluster winters can be very discouraging to those of us still enjoy snow sports and the photographic opportunities that “normal” winter provides.

Stop over at Fountain Lake (Fujifilm X-T10, XF 18-55mm f3.5)

Unfortunately, at this latitude, it appears that for at least this year, winter will be a cold damp brown and gray season with occasional teases of snow. I am starting to hate winter, but for different reasons that most of my friends.

Ice on Rhododendrons (Fujifilm X Pro 2, XF 56mm f1.2)

The worse thing about this has to do with living on a dirt road. For most of the winters over the last 25 or so years, the road will freeze in mid-to-late November and then remain frozen, and often snow-covered, until sometime in March when we get our first extended bout of above freezing weather. There will then be a roughly 2 week period, where the road becomes soft and unstable. Driving on it can feel as though he will sink down to your axles; it leaves our cars coated with splats of red shale mud. Then one day the road dries and compacts, and is all is well for the remainder of the year.

My road in Spring (Samsung Galaxy G7)

This year, the road has been through maybe 3 cycles of freeze/thaw which is getting rather irritating. Freeze/thaw also leads to large potholes in the paved roads. I really hate this.

February Cornfield 2015 (Sony RX 100 mark III)

I sometimes think I should either move permanently to the Adirondacks for January-March, or give up on the whole winter thing, go south, wear shorts with black socks, and gradually prepare for death.

On a happier note, I pretty much have determined that I will purchase a new X100f along with at least the TCL X1 100 mark II teleconverter (I use this much more than the wide converter). It will be extremely pleasant not to forget to adjust the camera when the lens converter is on (the phase II versions of the converters talk to the camera so it adjusts automatically). I’m hoping to use it in the Adirondacks, so I am waiting to see whether it goes on back order after the introduction date. At some point, my used (but not too used) X00t will go up on E Bay.

 Boy o’ boy, May feels a long way off.

A Broomball Tournament in Lake Placid

People standing on Ice at the Mirror Lake Inn

On the Ice at the Mirror Lake Inn (Fujifilm X100t)

There is a different and wonderful culture in the Adirondacks. It is one where outdoor activities feature prominently.  Events such as the Wooden Ski Race, and Full Moon Madness that I have described elsewhere on this site, as well as the Saranac Winter Festival, all display a physicality and an embrace of the season that is lacking for instance, in my Pennsylvania hometown.

On a recent trip to Lake Placid, I attended one of my favorites; namely the Broomball tournament, held at The Cottage, a waterside/ pub restaurant, that is part of the spectacular Mirror Lake Inn; a luxury resort hotel in the village.

Arounfd the firefor broomball at the Cottage

Around the Fire (Fujifilm XT-10, XF 56mm f1.2)

The Cottage is the pub and informal dining venue for the resort. In summer can be very pleasant to paddle a kayak or canoe to the restaurant’s dock , and stop for a bite of lunch.

For much of the winter, however, with Mirror Lake firmly frozen, an area of the ice is plowed behind the restaurant, and an informal hockey rink is set up. Then in January, the restaurant sponsors a tournament for the somewhat arcane sport, which is apparently the winter version of softball for many people.

Crowd at Broomball, Mirror Lake Inn

Crowd at Broomball, Mirror Lake Inn (Fujifilm X100t)

Broomball, is a sort of proto hockey. The rules are similar, but the equipment, at least in the case of the local variety is much less sophisticated. As I understand it was often played in tennis shoes, though there is actually a specialized shoe to wear which gives more friction to the icy surface. In the Lake Placid varient, the predominant “stick”, was an actual broom, with the bottom cut off about halfway up, then wrapped in duct tape. There is an actual broomball that is used, a little bigger than a softball.

Broomball action at the Mirror Lake Inn

Broomball action at the Mirror Lake Inn (Fujifilm XT-10, XF 56mm f1.2)

While some of the teams, had actual matching hockey Jerseys (and apparently padding), most people played in heavy outdoor clothing sometimes with whimsical touches. Everyone plays with some sort of helmet. In this multisport town, I saw players sporting rock climber’s helmets, skiing helmets, and even hockey helmets. Though it was quite mild (high 20s F) this year, I have seen it proceed enthusiastically with temperatures in the minus teens.

 More Broomball action at the Mirror Lake Inn

More Broomball action at the Mirror Lake Inn (Fujifilm XT-10, XF 56mm f1.2)

Now to be sure, Broomball, apparently in Canada, and parts of the US, is a serious sport with a governing body, and specialized equipment, and national tournaments. Not so much in Lake Placid. Though obviously a lot of serious competitive athletics goes on in town, this one is not so intense. Like many activities in the North Country, my impression over the years from this event, it is that it is first and foremost an opportunity to socialize and be convivial on a dark cold evening in January. It is only secondarily a competition.

 Even More Broomball action at the Mirror Lake Inn

Even More Broomball action at the Mirror Lake Inn (Fujifilm XT-10, XF 56mm f1.2)

The large crowd gathers both in the restaurant, where windows allow the games to be followed, or down on the ice around a warming fire built for the occasion. As the festivities continue, the bar gets rowdy, but never unpleasantly so. Many of the older folks, who prudently no longer play, share great memories of their own time on the ice.

Photo taken in the Cottage at the Mirror Lake Inn

In the Cottage (Fujifilm X100t)

It is one of the small events, that over the year makes Lake Placid a truly unique placed to visit.

The Gear that I Use: The Fuji XF 18-55mm f2.8-4

Tracks on the Lake(Fujifilm X Pro 1, Fujifilm XF 18-55mm f2.8-4)

Faithful readers of this site are aware of my affection for the Fuji X series cameras, both the X100 and the X Pro 1.

I think perhaps the one characteristic shared by both cameras is the very high quality lenses Fuji has designed for both devices. This includes the fixed 23 MM lens on the X100, and the three original prime lenses offered with the X Pro 1.  Still and all, there are times when a zoom lens is helpful, particularly in circumstances where “zooming with your feet” is impossible.  And although these cameras seem to have less propensity for motion blur then say, a digital SLR with the big moving mirror, it still an issue. It is particularly a problem when I use the cameras while hiking, when my vigorous cardiac contractions can cause camera shake.  With all this in mind, I was very eager to try the 18 -55 mm f2.8-4 image stabilized zoom lens Fuji announced with the X E1.  I was hopeful that the high quality of the prime “XF” lenses, would carry over to the new zoom.

I finally received word several weeks ago that the lens was in stock at B and H so I ordered one.  I’ve been shooting with it in a number of settings and would offer these observations.

Obviously this is less than a formal review.  There’ll be no resolution charts or other such technical data (I lack both the equipment and the inclination).

The Lens mounted, and the Case( Fujifilm X 100)

The lens arrived in the usual black Fuji packaging.  Included with the lens, is a scalloped lens hood and a pinch lens cap.  Unlike some of the prime lenses, the hood and lens cap function much like more conventional lenses (the hood can be reversed and stored on the lens).  The lens also comes with the familiar XF mount lens pouch which is larger than the lens, and closed by folding the end flap over itself (I’d really rather a drawstring).  Happily the build quality of the lens seems identical to the prime lenses.  The lens is mainly metal with very precisely machined ridges on the zoom and focus rings. Happily it is not much bigger than the 35 mm prime with its rectangular lens hood.

Unlike the prime lenses, the aperture ring has no markings and the aperture is determined by looking at the viewfinder, or rear LCD.  There is a separate switch which determines whether the aperture ring functions, or whether the aperture is set to automatic (allowing shutter priority shooting).  The movement of all the rings is very smooth.  I don’t use manual focus very much but the amount of travel required of the focus ring to go from near too far, seems fairly modest.  In my experience autofocus with this lens is fairly quick, perhaps roughly as good as the 35 mm.

The Shamrock on Saturday (Fujifilm X Pro 1, Fujifilm XF 18-55mm f2.8-4)

One great feature of this lens is that it is image stabilized.  It’s always hard to know how well this feature works.  I become fairly adept at shooting the non-image stabilized Fuji lenses without much motion blur.  Reportedly the feature is good for keeping the image sharp for 3-4 stops of longer exposure.

Carrie and Eddie (Fujifilm X Pro 1, Fujifilm XF 18-55mm f2.8-4)

This lens is really meant to be used with the electronic viewfinder.  At shorter focal lengths, the optical viewfinder can be useful, but as the lens is zoomed, the bright frame delineating the actual image, shrinks to a point where is roughly the size of the focus box, and thus essentially useless for framing.  I just keep the viewfinder set to electronic, which for me works fine.

I had the lens with me for a recent model shoot, and for a trip to the Adirondacks.  It is fairly fast (maximum aperture at 55 mm is f4.0).  For portrait work, I obviously used the long end of the zoom, but even with the slightly tighter aperture, background blur, I think was quite pleasing and the lens was very sharp.  I would have to say however, that the 60 mm f2.4 really shines in this setting.

Katie(Fujifilm X Pro 1, Fujifilm XF 18-55mm f2.8-4)

The lens really comes into its own for landscape photography.  Fitted to the X Pro 1, the combination easily fits in my small Mountainsmith fanny pack.  Particularly in the middle of its focal range, the lens is fairly sharp corner-to-corner and quite contrasty, much like its prime brethren.

I was curious to compare the lens to a known standard.  Unfortunately the only lens that I have in the XF line within the zoom’s focal length range is the 35 mm f1.4 so I shot them against each other using my usual tabletop scene, both at f3.6.

!8-55 100% Crop

35mm 100% crop

These crops are taken from the periphery of the image, as I think the center image is fairly close between the two lenses in terms of sharpness.  I think you’d have to agree that the 35 mm is better at the periphery, hardly a surprise.  I would say however that the 18-55mm has many of the same positive attributes, of the 35mm, and 60 mm I already possess.

It will be tempting to leave it on the camera most of the time.

With this lens I have no burning desire to obtain the 18 mm prime lens.  The 14 mm f2.8 and the upcoming 23 mm however still interest me, and I will look to acquire them.

Warm Day at the Ice Lakes(Fujifilm X Pro 1, Fujifilm XF 18-55mm f2.8-4)

In summary, this is a really nice addition to the XF lens line.  It appears to continue the reputation of the Fuji lenses for great optical quality at a very reasonable price.  If I had to do over, I might have bought an XE 1 with this lens (which makes the lens an even better bargain) and then acquire the primes over time.

Adding it to my X Pro 1 has made the system a lot more versatile and fun.

Photography on Nordic Skiis


Small Spruce on Black Pond (Olympus E 510, Zuiko 11-22mm f2.8)


 Cross Country Skiing???…that’s too much work.

I am fortunate to reside in a portion of the eastern Pennsylvania Mountains (hills, really) where snow is fairly reliable from January through March. I also have a residence in the High Peaks region of the Adirondack Park in northern New York, where one can generally add a month on each end of the Pennsylvania snow season.

Since childhood, I have enjoyed snow sports of all kinds, but for the last thirty years, skiing, has been a dominant winter activity. It’s pleasant, that in both of the locales where I reside, that most of, my friends are also skiers.

I have been an avid downhill and Telemark skier in the past, but a bum left knee has left me somewhat hobbled in this regard. While allowing a few years to pass prior to undergoing knee replacement, I continue to at least be able to cross-country ski, which in some ways I enjoy more than its more glamorous sister sports.

Snow Squall near Rocky Falls (Olympus E 20)

Cross Country Skiing has several advantages. First, it’s cheap, both in terms of equipment and venue costs. To get fully outfitted for downhill skiing (skis, boots, bindings, and poles) could cost US$600-1000. I can find a nice touring cross-country set up ( the kind of skis you’d use on your local golf course or hiking trail) for between US $250-350.

Then there’s the clothing. Alpine skiers tend to use different clothing (warmer, less emphasis on breathability, more emphasis on style) whereas, if you’re already hiking in all seasons, cross-country garb tends to be an extension of your typical outdoor layering clothing strategy.

Some of my crusty old friends still insist on skiing in wool sweaters, and knickers with knee socks like we used to do thirty years ago.  Oddly enough, wool works pretty well, except that everything tends to stick to it. You look like a snowman if you fall.

Then there is the venue. In the Adirondacks, a day of skiing at two Olympic skiing sites varies rather widely. At the time this was written (2011) a downhill ski lift pass at Whiteface Mountain is around US $80. By comparison, to ski at the Van  Hoevenburg, Cross Country Ski Center (as well-groomed and full featured as anywhere in the country), costs a relatively modest US$20. Its trail system connects to the equally lovely Cascade Ski Center where a ticket is an even more reasonable US$12. In truth, resorts such as these are a luxury.  Most of the time, I end up “backcountry” skiing on public land where typically there is no fee.

Chimney at John Brooks Lodge (Fuji S3, Nikkor 18-35mm f 3-5)


When I bring up the topic of cross-country skiing to someone who has never tried it, the invariable comment is something like: “that’s a lot of work”. Actually once you learn the technique, moving at a brisk pace over level or even rolling ground is fairly easy. Like all forms of athletic activity though, if pursued with vigor, it’s a formidable workout.

Photography from skis can be very fruitful. Whether on alpine gear at a downhill resort, or on a tour on Nordic skis, the surrounding scenery tends to be rather striking.

Behind Pitchoff, on the Jackrabbit Trail (Panasonic GH1, Lumix 14-45 f3.5)

Doing photography however, while pursuing any athletic activity has its problems.  Active muscle tone and a bounding heartbeat can make obtaining sharp images a challenge. Camera stabilization is very important. Something as simple pausing for five minutes after exertion to allow your heart rate and “contractility” to subside a bit can help to avoid camera shake. Ski poles, tripods and, in fact any fixed object you encounter can be helpful.

It can be intimidating to carry hundreds, if not thousands of dollars worth of camera gear in a pack if you are not a confident skier. Hone your ski skills before packing up your most valuable gear before a challenging run. Until your pretty sure you’re not going to fall onto and crush your brand new point and shoot ( or fall on your D3 , and injure yourself), pack along more expendable equipment. If you’re not yet ready to ski with your camera equipment, snowshoes can be another, somewhat easier way to venture into the winter wilds.

Old Guy on Snowshoes

I really like the Panasonic G-series cameras for skiing because they are light, moderately priced but can still capture high quality images. They are also fairly sturdy, but I still think that they would deform in an accident, sparing my spleen.

I tend to carry camera gear in a large “fanny pack” with a shoulder strap over my left shoulder, and the hip belt tight enough to inhibit bag migration. When I want to shoot, I loosen the belt, and swing the band over my right hip, towards the front, where all of the contents are convenient to access. The Mountainsmith pack that I use fits a G series camera with several lenses, extra batteries and memory, a water bottle, plus room to carry a shed layer, all without disturbing my sense of balance.

Ice Fog, Arbutus Peak (Nikon Coolpix 4300)

Longer, more ambitious winter trips require gear that will only fit in a larger backpack. In this case, a smaller fanny pack can be carried up front, for quick access to your camera gear.

Skiing into remote areas allows one to observe and photograph even familiar territory in a whole new light, and get some wonderful winter exercise.

 And it’s really not that much work.

Thoughts on Photography: Camera Support


Pennsylvania Winter Farm (Nikon D7000, Nikkor 16-85mm f3.5)


Occasionally, a budding photographer will approach me for advice on how to capture better images.

I think that my answer must disappoint them. I’m sure most beginners really hope that I can direct them towards the purchase of a particularly sexy piece of gear, such as a camera body, or a particular lens that will set their photography afire.

They want to talk about gear. I want to talk about composition, and technique. Particularly, I want to talk about rather mundane basics such as the nature of optics, shooting discipine, and camera, and lens support.

Not that there aren’t some great photographs blurred by subject motion, or camera movements.

Most great images are sharp, even if it is at a narrow point of focus selected by the shooter.

 Generally, for an image to be sharp, the camera and lens need to be still relative to the subject, as the shutter is released.

Now, there are many ways to properly stabilize a camera.

My first rule would be: the human body unaided, is at best, only a fair camera support.  Now true enough, a practiced pro shooter can hand-hold, and certainly achieve great results, usually far better  than an amateur. There are reasons for this. First, the pro is practiced at taking still images, much in the way a fine marksman, can draw a bead and hold very steadily on his target. It takes concentration and lots of repetition. There are places to learn this: here, and here.

 Most amateurs have lousy technique. They think that they can hold a camera, arms akimbo, far out from the body, trying to shoot a telephoto shot through a slow zoom lens, at an impossibly slow shutter speed, and still achieve Sports Illustrated quality shots of their precious soccer-playing offspring. It doesn’t work that way.

A pro understands that the proper shooting technique is to hold the arms close in to the body elbows braced against the chest or abdomen, and the viewfinder pressed against the face. Holding as modern digital camera out away from you while you frame with the viewfinder, is generally going to lead to fair snapshots, but lousy fine art prints.

Also, often pro camera gear, is heavier. This means that the poke of the finger on the shutter, and the movement of the mirror and shutter, on an SLR, is working against the greater mass of, for instance,  a heavy, metal-bodied  camera such as a Canon 1Ds mark II, rather than a diminutive plastic consumer grade Digital Rebel. It thus creates less blur-inducing movement.

 Most landscape purists use tripods… period. Many shoot large-format cameras that are too unwieldy to be practical for anything but tripod mounting.  The true purist would use, very heavy tripods with equally beefy camera mounts that add mass to the camera body and couple it rigidly to the floor or ground, essentially eliminating camera movement.

Camera Support (Nikon D7000, Nikkor 16-85mm f3.5)

Tripods are great for detailed images. They are less useful when for hiking long distances, for discreet shooting and sometimes, for spontaneity.

 Obviously, there are available, stabilized lenses, known as IS lenses for Canon,OIS for Panasonic, and VR lenses for Nikkor. These can partially make up for camera shake. Modern Sony, Olympus, and Pentax SLR lenses are generally stabilized by the camera body itself. Whether in the lens or body, stabilization is a useful feature, but can only be counted on to compensate for modest camera movements at reasonably fast shutter speeds.

Coppras Pond Shore (Olympus 510, Zuiko 11-22mm f2.8)

Combining a heavy tripod with a remote shutter release (or releasing the shutter by using the camera self timer) is still the best way to obtain sharp, enlargable landscape prints.  This is especially true when shooting moving water, or in low light situations.  We should probably all do this, all the time.

Lucifer Falls (Fuji S3, Tokina 28-80 f2.8)

In fact, good technique and less megapixels, will sometimes trump bad technique with more megapixels in terms of fine detail reproduction.

I have walked, snowshoed, and skied many miles with a tripods strapped to my pack. In a target-rich photographic environment, I sometimes leave the body and lens attached to the tripod, and travel with the combination over my shoulder, much like the way Huck Finn would carry a fishin’ pole.

 Lately though, I have changed tactics.  I found that sometimes setting up all the gear to work as a purist means that there are shots you won’t take because, it’s too much trouble. I still do use a tripod on formal shooting days. But for more casual opportunities, or for situations where I think that the neighbors will react badly to my presence, I use other techniques.

Cross-country skiing is one example. I have two ski poles in hand, and often, no where convenient to carry a monopod. I will then have to improvise.

Holding crossed ski (or hiking) poles with my thumb and third to fifth finger, I can improvise a bipod with the pair. My index finger can then encircle the barrel of the lens which rests in the cross. This works pretty well.

Whiteface Mountain,Wilmington Trail (Panasonic G1, Lumix 14-45 f3.5-5)

Trees when well located can be used to stabilize things, either by leaning against them, or bracing the camera hard against the bark. A small sandbag in your bag is helpful to facilitate the latter.

Any firm stable object can be useful. Fence post and bridge rails make fine camera supports. With SLRs, it is useful to press the camera into the support, to damp the movement of the mirror. Again a sandbag is useful to position the camera on a hard surface.

Logs, the hood of your car, your mountain bike seat, even rocks in the middle of a stream, can offer a shooting platform, as well as a non-intuitive, but unique shooting viewpoint. The Panasonic G 1-G1h- G2h-series cameras are great for this as they have an articulating view screen for framing at weird angles, are physically small, and have no mirror, and thus no “mirror slap” to dampen.

Hawk Falls, Winter (Panasonic G1, Lumix 14-45mm f3.5-5)

Finally, most often lately, I use a monopod.  Mine is a steel Bogen-Manfrotto unit with a sturdy ballhead mounted, a ballhead similar to, if less robust than the one on my good Gitzo tripod. Both ballheads use the same camera shoe so that I can switch back quickly between support options.

The monopod is a solid, heavy steel unit. The weight is an advantage when mechanically coupled to the camera, and then to the ground. There is a rubber foot, which can be slipped off to reveal a metal spike.

Wright Peak, from Heart Lake (Nikon D2x, Tokina 28-80mm f2.8)

It makes a robust hiking pole. I keep it in my car wedged between the passenger seat and the console where it is readily available for “grab shots”. I have also suspected it would make a formidable self-defense weapon.

Monopod in my Car (Nikon D7000, Nikkor 16-85mm f3.5)

For landscape photography, I extend the monopod to the length I need. I make sure all of the joints are tightly locked. I position the camera with the ball head and then lock it down tight. I find that placing some weight on the camera-monopod assembly and making sure it if firmly engaged with the ground before tripping the shutter, allows me to take very sharp images even at marginal shutter speeds. I can grab good shots very quickly with a monopod in situations where a tripod would be slow and cumbersome.

Circling at Lake Silkworth ( Panasonic G-1, Lumix 14-45mm f3.5-5)

If you aspire to create photographic images beyond the average, you need to spend time learning the basics. 

These methods may seem tedious and even stifling. Always remember that good camera technique and save you from opening your compositional masterwork, the one you hiked hours to capture, only to find is a blurred, unprintable mess.

Take the time and trouble.

It’s worth it.

Fog


Red and Orange (Panasonic GH1, Lumix 20mm f 1.7)


On a day off, especially if I am awakening in the morning during a photogenic season, or in a scenic place, I have to make a decision.

Do I get up, grab my photo gear and go out early, or do I “sleep in”. This is a decision that I usually make based on the weather.

If it’s cloudy, I stay in bed, knowing that the same shooting conditions that I would encounter at 6 AM will exist at 11. I can sleep a bit, have breakfast and coffee, and still get good light.

If it’s clear, I think about it. You have to get up very early, arguably before sunrise, to catch the very best light. If I can look out the window and can already see that it’s clear, I probably already missed the best shooting. Have to wait until sunset.

If it’s foggy however, particularly if there’s no rain, I’m up instantly. For fogs, or mists, in many ways and in their many forms provide a wonderful backdrop for landscape photography.

Sunrise and Corn ( Fuji S3, Tamron 17-50 f2.8)

Landscape photographers need to try to understand the weather. It’s helpful to anticipate the atmosphere’s behavior in order to be present for the best shooting conditions. I’m not a meteorologist, but I know a few things:

I know that in the fall of the year, when a cold front passes after a period of warmth, fog will form in valleys, particularly in river valleys, while the surrounding ridges will be clear. The amount of fog will depend on the “dew point” of the atmosphere.

Market Street Bridge, Fall Morning (Fuji S2, Nikkor 18-35mm f3.5)

I know that a similar phenomenon occurs anytime cool moist air passes over warmer surfaces.

I know that it is not unlikely to have fog, when there is an ice storm in the winter.

I know that fog will occur at times I cannot predict.

Fog is like free bokeh (see definition here) provided by the atmosphere. When it is thin, it blurs and deemphasizes the background detail, focusing one’s attention on the subject.

Betty the Sheep (Fuji S3, Nikkor 18-35mm)

When it is thick, it can transform the commonplace into the abstract. It can change a pedestrian scene, into a more magical vision.

Lake Placid, Foggy Morning (Nikon D2x, Nikkor 17-35mm f 2.8)

It helps to have equipment that is relatively moisture resistant. Don’t underestimate the pernicious effect  of water vapor on electronics. Don’t bring warm cameras out into cool moist environments. If you do, water will condense onto the electronics, and lenses will fog. At the least, it helps to have a lens cloth available.  

Better yet, let the equipment equalize to the ambient temperature (I usually leave my gear overnight in a place where that can happen). Typically then, there will be few issues.

Deer in Fog (Panasonic G1, Lumix 14-45mm)

Every once in a while, Mother Nature helps us with our craft.

Take advantage of it.

October 18, 2010

Alright , I admit it. I screwed up A number of our readers pointed out that the real danger of condensation on camera lenses, and in camera bodies occurs when cold equipment is brought into warm environments. Bang, you got me. In my own defense however, I would say that I was trying to warn my gentle readers about the perils of using electronic equipment, in ultra-humid environments.

I am greatful that people are paying attention.

 I hope you’ll continue.

New Header Image.


This is an image taken in 2007 with my D2x and a Nikkor 18 -200 f3.5-5 VR.

It was taken in Lake Placid New York in early October of that year at “John Brown’s Farm”.

This is the resting place of the abolitionist (and leader of the rebelllion at Harper’s Ferry). It is is now an National Monument. 

The image depicts the contrast of “peak” leaf color at the farm’s 1800 ft of elevation, against a backdrop of the much higher terrain of Algonquin, and Wright’s Peak, which had already seen their first snow cover of the season.

It will will always be a striking memory of the beauty of the Adirondacks.

Unexpected, but Nice


On the Rocks ( Panasonic GH1, 14-45mm Lumix)

 Sometimes an image will surprise you in small but delightful ways.

   Sometimes it will be the inclusion of an unnoticed detail in a corner of the image that adds interest to the eye.

  When shooting on the water, it can be a feature under the surface, unseen through the viewfinder, but revealed courtesy of the polarizing filter you thoughtfully placed on the lens.

   In my case recently, it was blue light.

  I was camping with my daughter Brigid, a sort of last attempt to bond before she escapes to college life. We paddled our kayaks to an island in the Saranac Lake chain of upstate New York.

  Truth be told, she wasn’t real happy about this. Her brother escaped “dad duty” as he had brought two friends with him on our trip up north, and there weren’t enough kayaks. His time will come.

Waiting to Launch (Panasonic LX-3)

  I was going one way or another, and I’d like to think if anything, Brigid went to make sure that I didn’t capsize and drown.

 This particular trip is lovely.  You “put in” at a state sponsored site on the Saranac River and paddle through a series of ”ponds” prior to emerging into the vast waters of Lower Saranac lake. This is a large convoluted body of water, connected to the Middle Saranac Lake again by the Saranac River which reappears at the southwestern end of the lake. Multiple islands erupt from the lake floor. They vary in size from single rocks harboring a small pad of soil and a few conifers, to multiple acre-sized landforms covered in White Pine and northern hardwoods. This makes Lower Saranac a pleasant, visually interesting, largely sheltered place to paddle, though we did encounter fairly fresh winds and chop over the open sections we had to traverse.

   As they were loaded with gear, the ‘yaks rode lower in the water than usual, and it was somewhat difficult to “beach” them on the steep and slippery gneiss shoreline on the island we had chosen. Once secured, we unloaded and set up camp.

The NYS DEC maintain this area nicely. There are nice wide open tenting areas. There is even a privy available (definitely necessary, as these are busy sites)

Each site has a concrete fireplace, correctly designed to provide reflected heat for the cool Adirondack nights (thirty to forty degree nights would not be uncommon).

  I removed my Panasonic GH1 and two lenses from the dry bag where they resided for the trip over and waited for the light to get interesting.

  I had thought about taking some video, especially if the lake’s loons cooperated by calling prominently, but they were quiet that night. A few of their mournful cries were audible, but only in the distance. We contented ourselves with the warbling of wood thrushes, the chittering of the islands sole red squirel, and the occasional sound of passing powerboat.

Power Boat at Sunset (Panasonic GH1, 14-45mm Lumix)

   Periodically, dark clouds appeared, threatening rain. Happily it held off until much later, when we were finally zipped into the tent for the night.

  At dusk, the temperature dropped and fire seemed like a nice idea. I gathered wood and using the bark from a birch log we found already at the site, started one fairly easily.

  I spent a lot of time in the hour around sunset, shooting from various vantage points before returning to the campsite for good.

   There, Brigid and I sat around the fire as the light faded. The glow of the fireplace was evocative. I had no tripod on the trip ( yes, I know, big faux pas) so I was forced to set the camera at ISO 1600 (not the GH1’s best strength) to get reasonable shutter speeds.

   I asked Brigid to stay very still, and shot several frames with her in the foreground, counting on the image stabilization to keep things sharp. It was important to if anything, over-expose a bit (with a fire as the bright point it doesn’t matter so much), to avoid shadow noise. I looked at the image on the LCD in camp, it looked OK, and I put the equipment away for the night.

   I shot a few more images in the morning before we left the next morning but the sky was cloudy and the light mostly unremarkable. Still… there were moments.

Morning at Hatchet Island( GH1, 14-45mm Lumix)

   When I got back to my computer and was able to view the images in Photoshop, I noticed something I hadn’t seen in camp. In sharp contrast to reds and oranges of the firelight, was a soft blue glow evident through the trees at the shoreline, the fading blue of the night sky reflected in the water of the lake. I played with raw image a bit, pushing the exposure to a point that enhanced this effect (but only a bit). I was surprised and impressed with the camera’s dynamic range and metering which had allowed all of this to be recorded.

Brigid by the Fire (GH1, 14-45mm Lumix)

I like this picture. It reminds me of the numerous, and largely anonymous campfire scenes one sees for sale at souvenir shops throughout the Adirondacks.

  More importantly, it will always remind me of a very pleasant memory of time spent with my daughter before she embarks on a new phase of her young life.

BTW Brigid, Happy 18th.

12